
Blog
Compilation Templates and Layout Impacts With DocBoss
In DocBoss we were refer to databooks as compilations. They can be customized to suit the requirements of your customers…
One of the great benefits of DocBoss is its ability to help you customize documents in whatever way your customers desire, right down to the headers and footers.
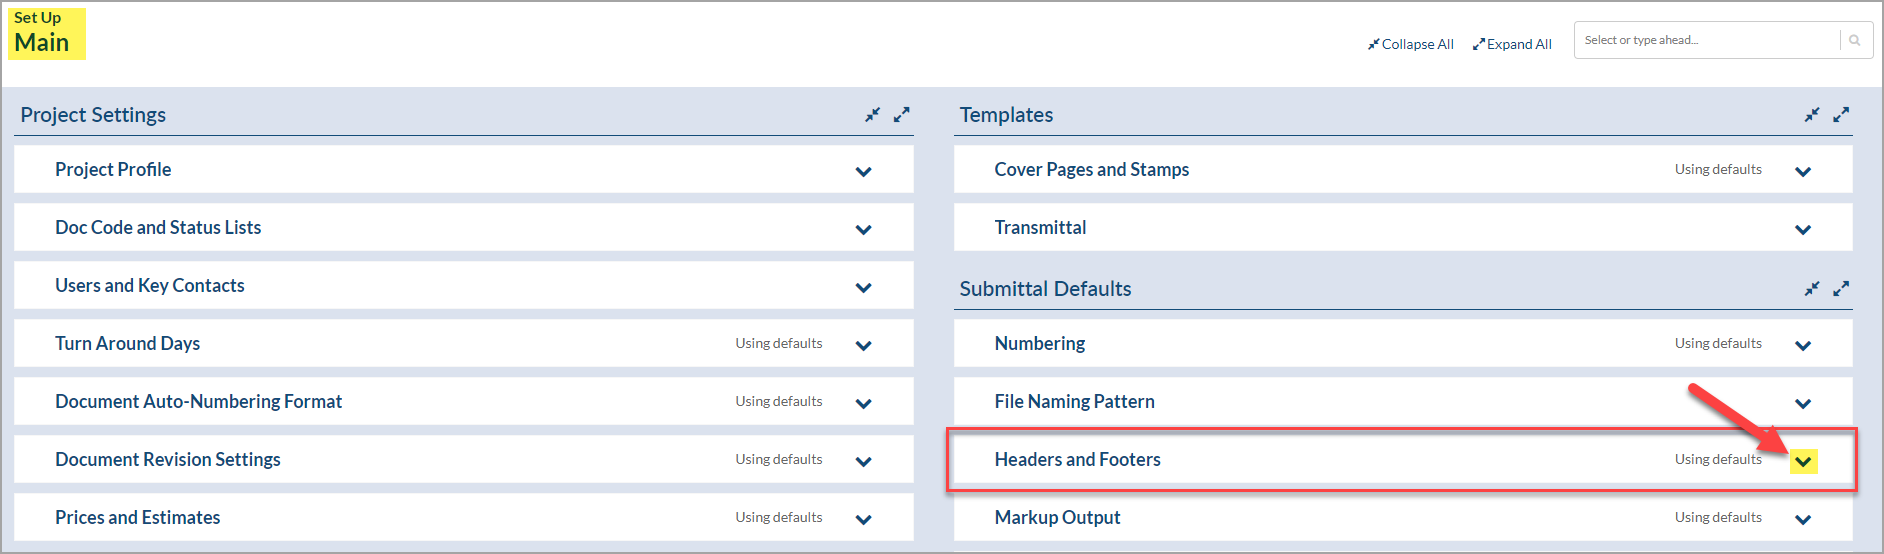
To add and edit headers and footers to your documents, navigate to the Main Setup page of your project where available fields are shown in the Formats group > Document Header/Footer Settings.
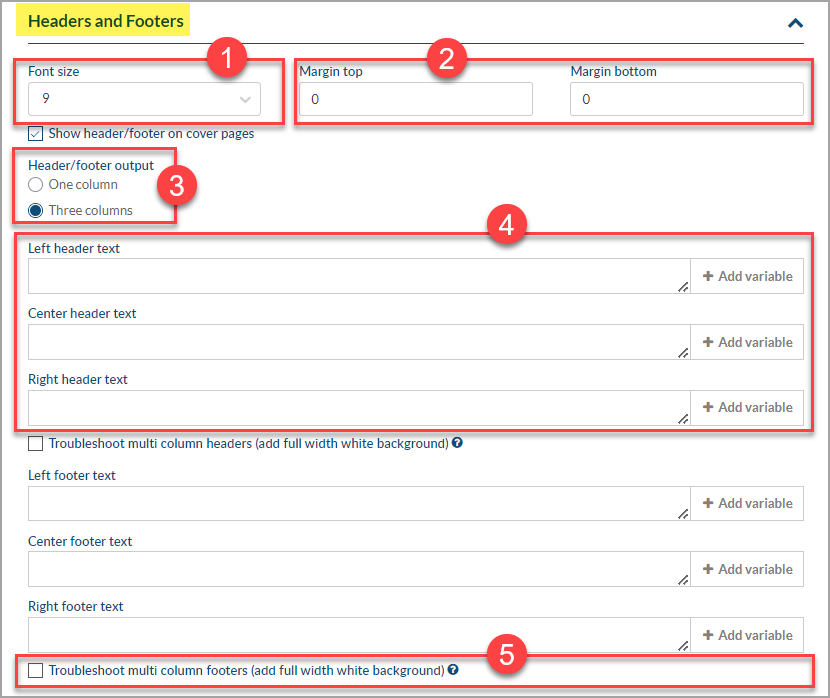
To edit format, select the desired variables by clicking on each available field, or type text manually. It’s also possible to add new variables by creating custom Doc Code/Card fields. For more details about new fields click here.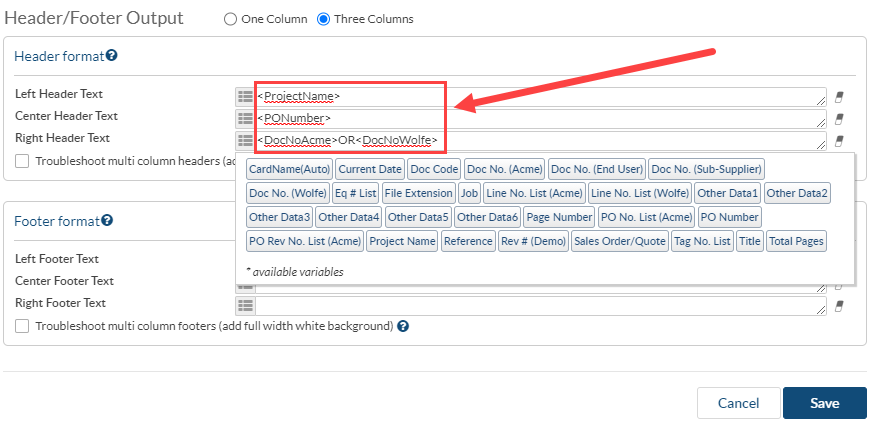
Data can also be added in more than one line if required, by pressing Enter on your keyboard, in any of the Text fields.
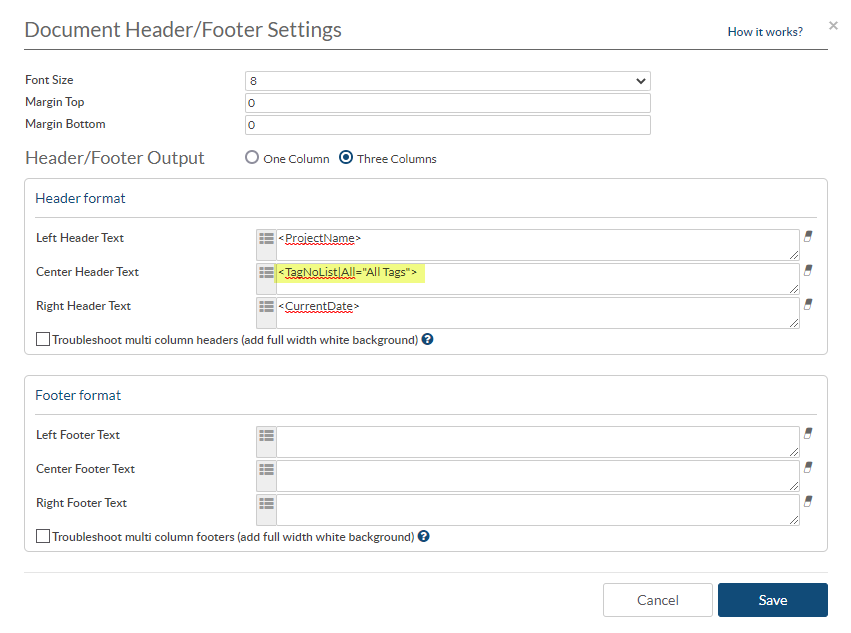
All non-standard characters such as other languages, are now supported in headers and footers.
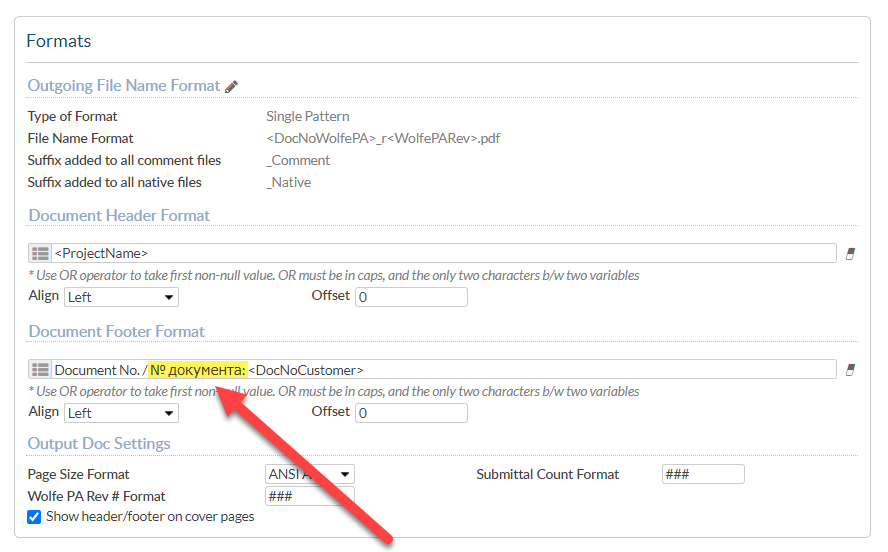
Show header/footer on cover pages – Be sure to mark the checkbox if you wish to use the header and footer format also in the cover pages.

Note: When a document doesn’t change (i.e. new version is not updated), the system will NOT re-apply the header footer. This usually happens when re-sending the documents received from the customer for final approval.
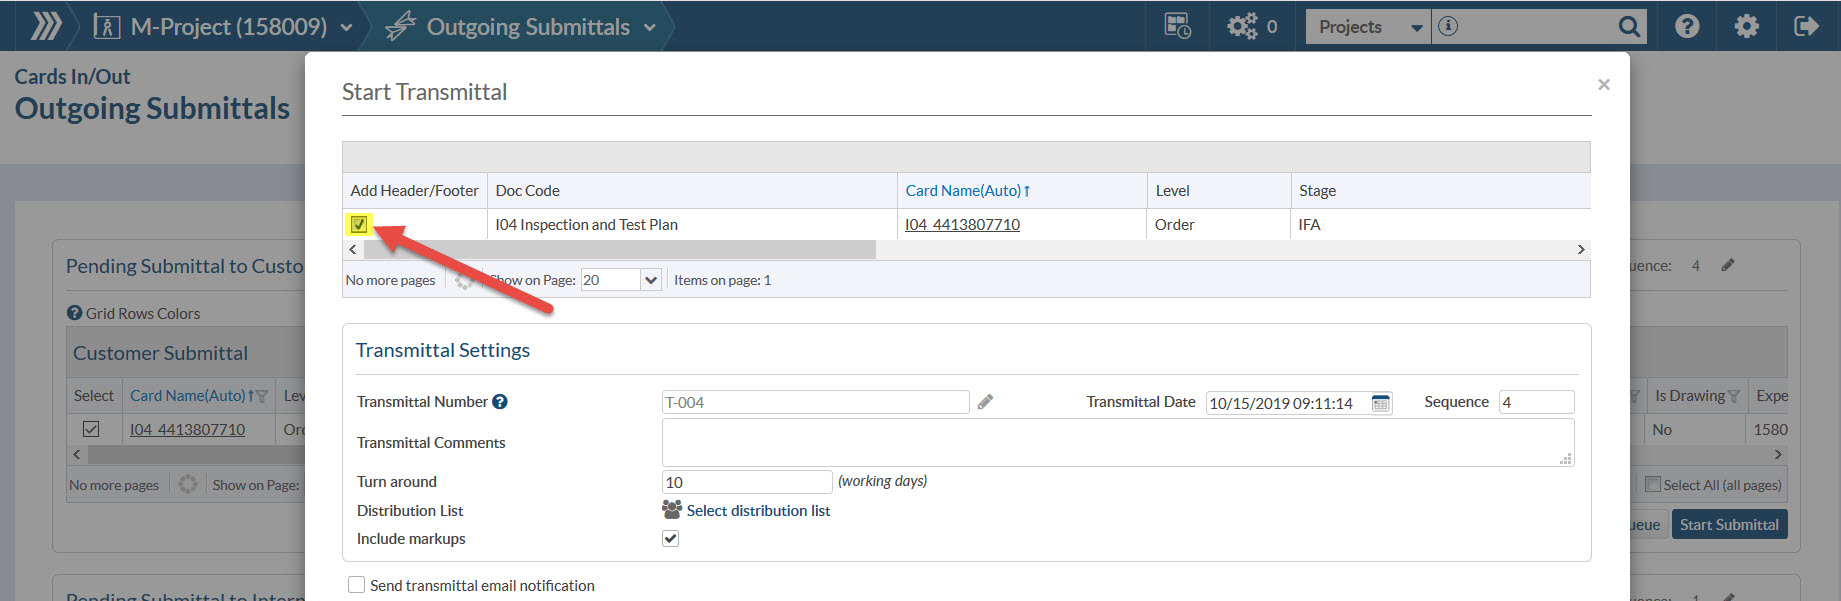
To edit the setting on a specific submittal, you can check the “Add Header/Footer” checkbox on the submittal window.
You can edit this setting on each card prior to the submittal window if you prefer.
If you wish to toggle the header/footer for all cards for a doc code, you can do that on the code list.
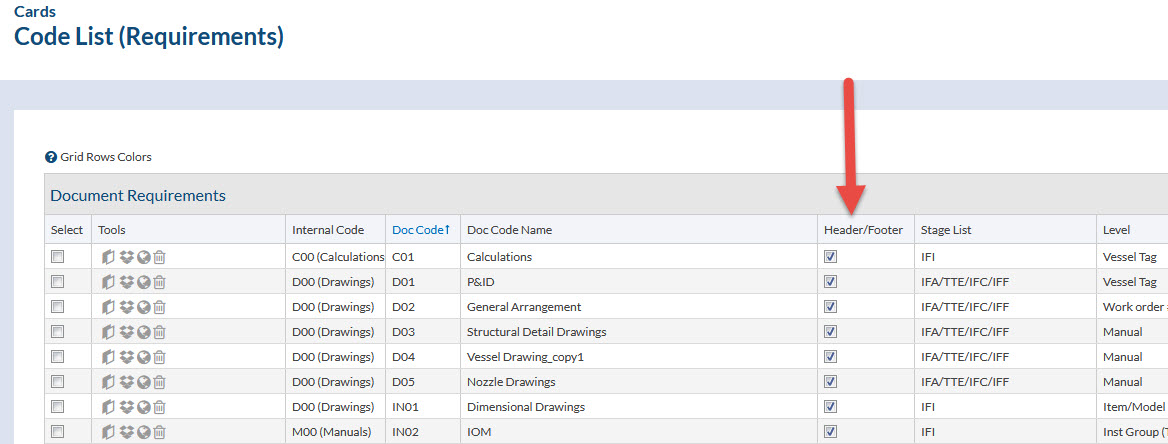
* Note that if you want to immediately apply the change to all cards for that code (if the file is already uploaded to the card) you must select the code and click Apply to Cards (button at bottom) after you make the setting in the code list.


DocBoss is the only true document control system for
suppliers. Book a quick demo to see how we help process
equipment suppliers make more profit with less pain.
In DocBoss we were refer to databooks as compilations. They can be customized to suit the requirements of your customers…

When setting up a stage with an internal target, you will see an option to Route to [Role 4] (When looking at…
Users can now make edits to any of the fields in a historical entry. All changes are recorded, and the…