What If I Change Settings When A Project Is In Progress? (Cover Pages)
DocBoss enables you to customize items right down to the font on your cover pages. Sometimes you might need to…

A distribution list defines the recipients of a transmittal. The list of names is typically included into the transmittal summary (depending on your transmittal template).
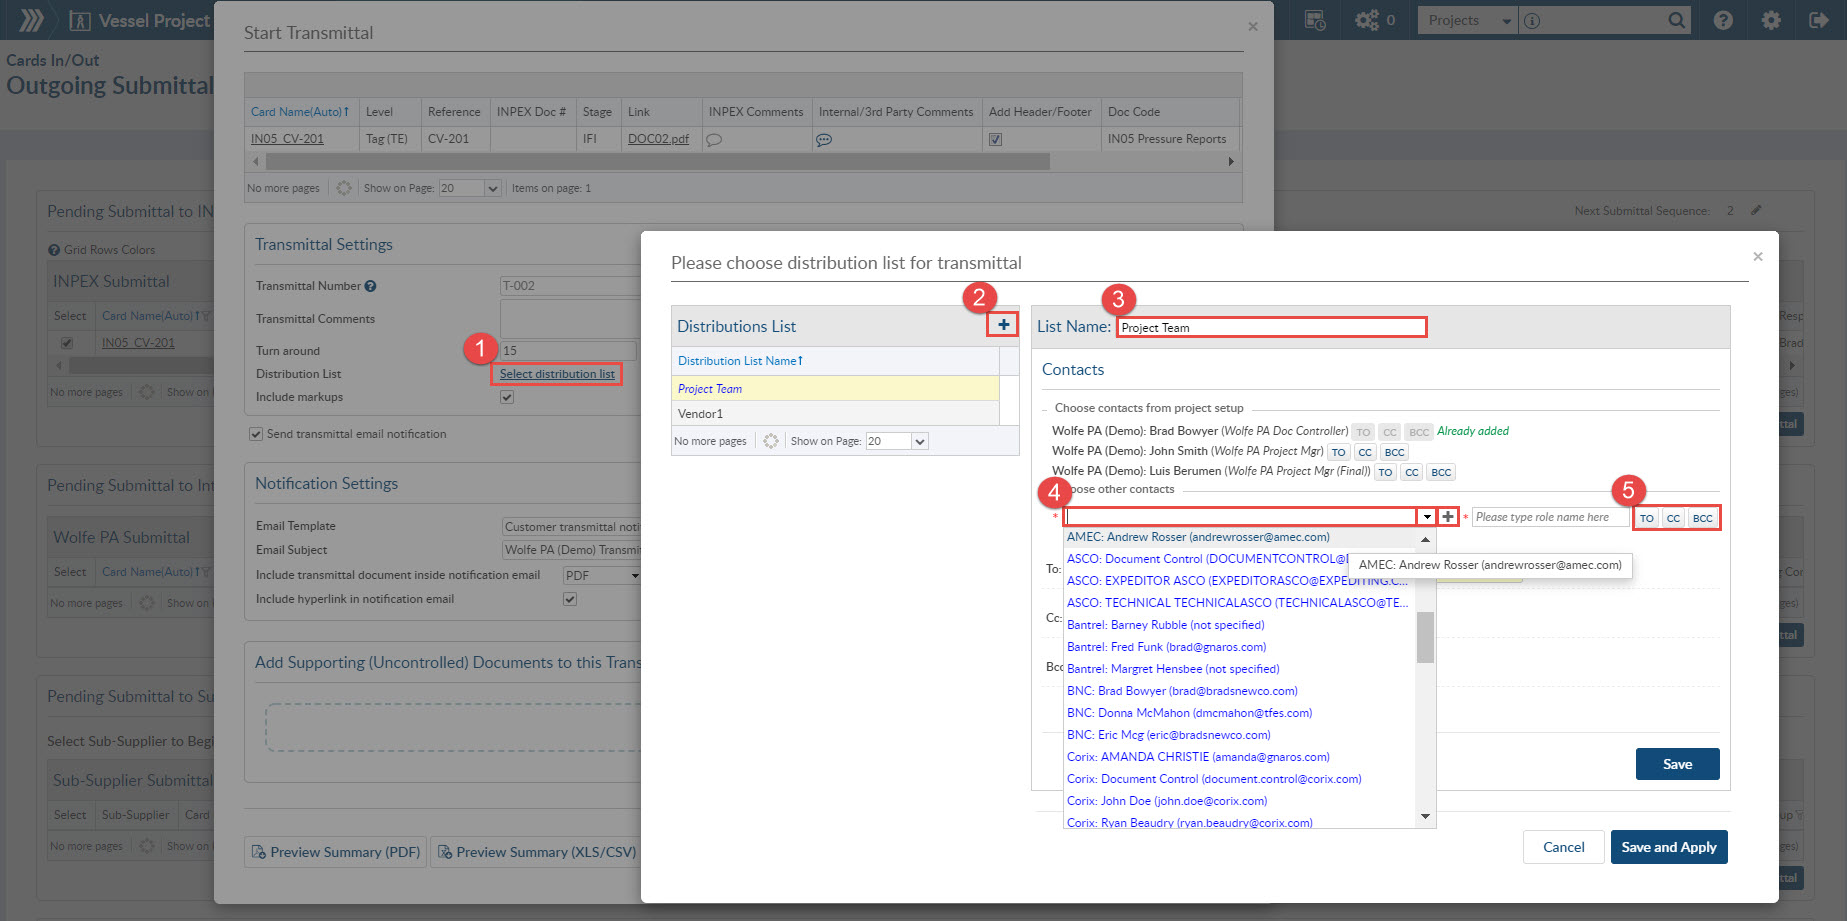
Distribution lists are typically created during the transmittal process. After you have started your transmittal and you are in the process of entering applicable information, there is a link “Select distribution list”. If you click on this link a pop-up will appear.
The left side of the pop-up is previously created distributions lists and the right hand is where you will enter information to create a new list.
 Please note that you add or update the contacts on your distribution list at any time.
Admin users can create distribution lists under Admin > Distribution Lists. These lists will be automatically available for selection on all new projects, and can be imported into existing projects if required.
On the Distribution Lists screen, select the plus icon (+) in the top right of the grid to create a new distribution list. Name the list, add the applicable contacts, and save.
From the project menu, select Set Up > Distribution Lists.
If the required list is not showing in the grid, users can add a new list or import from the instance (global) lists.
Distribution lists within a project can be customized to suit the needs of that specific project. (This will not affect the master list saved under Admin.)
These distribution lists are available to select for submittals on the project.
Any unrequired lists can be hidden if the user does not wish to see them – simply select the delete icon under tools to hide individual lists, or select multiple lists and click the Hide distribution lists button (on the bottom right of the grid).
DocBoss is the only true document control system for
suppliers. Book a quick demo to see how we help process
equipment suppliers make more profit with less pain.