
Product Updates
How To Enable DocBoss Support Access To Your Account
Did you know that DocBoss support staff can help you directly with issues related to your account? While we have…

This article explains the third step in the eSign process.
Check at the bottom of the page to view steps 1 (Generate an eSignature Certificate) and step 2 (Set eSignature requirements per Doc Code).
Select the documents you wish to send and start the submittal. You will see the normal pop up with a few different options.
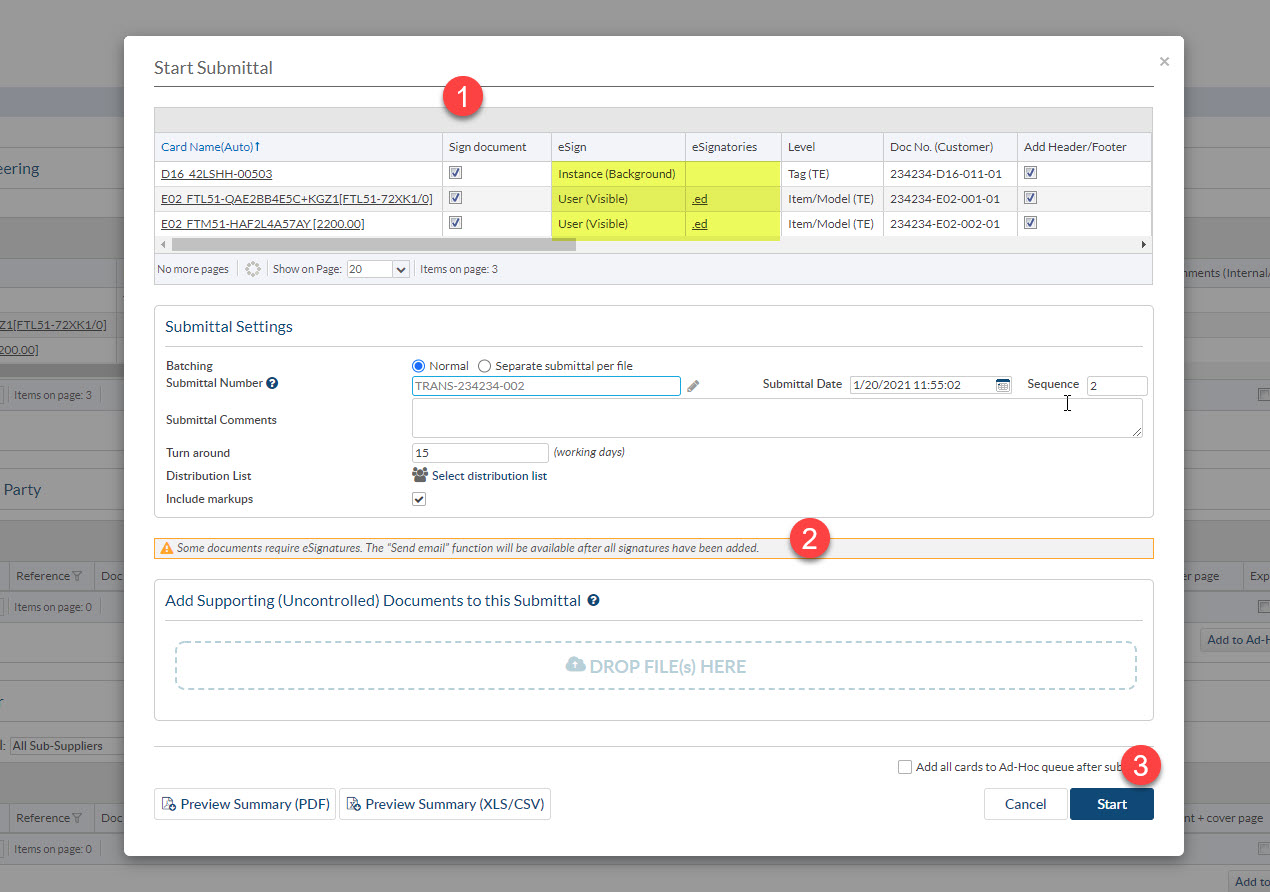
1. New columns showing eSignature defaults. Can remove signature requirements if desired.
2. Warning that some files require eSignatures, so the submittal will not be issued to target until signatures are finished.
3. The “submit” button is replaced with a “Start” button.
The submittal will process (add cover pages etc.) but will be placed on HOLD.
The submittal shows as “Waiting for eSignatures” and the entry has a background color.
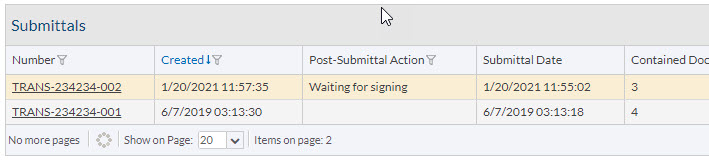
Once all required signatures have been applied by users, an alert will appear:

Navigate to the Outgoing Submittals” screen and scroll down to the submittal grid. Here you will see the submittal highlighted in green with a “Post-Submittal Action” stating “Signed, ready to send”. Click on the transmittal number and you will have the option to send the email out.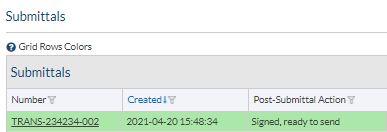
For information on how to Generate eSignature Certificates (Step 1), see our article here.
For information on how to Set eSignature requirements per Doc Code (or Card) (Step 2), see our article here.
For information on Signing files with eSignature (User action) (Step 4), see our article here.


DocBoss is the only true document control system for
suppliers. Book a quick demo to see how we help process
equipment suppliers make more profit with less pain.
Did you know that DocBoss support staff can help you directly with issues related to your account? While we have…
In DocBoss, cards are essentially placeholders for the actual documents. Like a file folder, if you will. A card contains…

Do you manually populate your document register and then have to manually update it each time it changes? With DocBoss,…