Product Updates
How DocBoss Limits Access To Your Users (Admin)
DocBoss enables you to customize your EPC submittals right down to the font on the cover pages. But did you…

There are 4 user access levels available in DocBoss:
User roles are default permission sets available to users. You can choose to have as many or as few of each level as you require.
Below we will discuss the Review user level and why you might choose to utilize this role within DocBoss.
This article provides an overview of the areas of DocBoss that are especially useful for reviewer users – knowing these key features will set you up for success!
Click to navigate to a section:
1. Login: email address
2. Password: provided by your administrator
1. Logo Menu
a. Quick access to dashboards, project list, multi-project card report, and signing page
b. *Same options available below in secondary bar*
2. Recent projects
a. Quick access to the projects you’ve visited recently
3. Active processes
a. Provides a list of any in-progress actions (e.g., submittals being sent, compilations being generated, etc.)
b. Actions typically initiated by doc controller(s)
4. Search bar
a. Allows searches for projects, contacts, companies, documents, and libraries
5. Support sitea. Re-directs you to the DocBoss support site, where you can find information about any/all DocBoss features
6. System menua. Provides access to your profile, as well as the lists you have access to (i.e., companies, contacts, relationships, and jobs)
7. Exit (i.e., log out)

1. Find projects
a. Search box in top right
i. Projects > Search by Project name, PO number, Job number, Sales order number (i.e., Ref number), etc.
b. Look for projects in:
i. Project dashboard
1. Filter results (e.g., “Select Project filter” = shows all projects you have access to
ii. Project list
1. Search by keyword
2. Sort/filter in the grid (e.g., filter by your name in role user columns)
3. Use quick filters (e.g., Only my projects)

2. Find documents in multi-project card report
a. Search by keyword
b. Sort/filter in the grid (e.g., filter by your name in role user columns)c. Add non-column filters (e.g., all due cards)d. Article: Multi-Project Card Report
3. Find all (cross-project) actions from actions dashboard
a. Sort/filter in the grid
b. Use quick show/hide filters (e.g., Show my actions only)

(Project Menu > Cards > Card List)
Reviewer users can view all cards on the project, including the card history. The active file can also be downloaded by clicking the icon in the “Document” column.
| NULL | Needs active file (i.e., document has never been uploaded) |
| X | Customer status not yet assigned (i.e., document added to the system) |
| Z | System completed (i.e., document workflow is fully complete) |
| 1 | Approved |
| 2 | Approved with Comments |
| 3 | Rejected |
| 4 | For Information |
| + | Submitted to Customer |
| – | Submitted to Sub-Supplier |
| * | Submitted Internally/to 3rd Party |
| ( ) | Pending submittal, expecting document return (contains above code) |
| < > | Pending submittal, not expecting document return (contains above code) |
| d | Doc Controller |
| p | Preparer |
| c | Checker |
| a | Approver |
| {A} | Approved |
| {P} | Pending |
| {R} | Rejected |
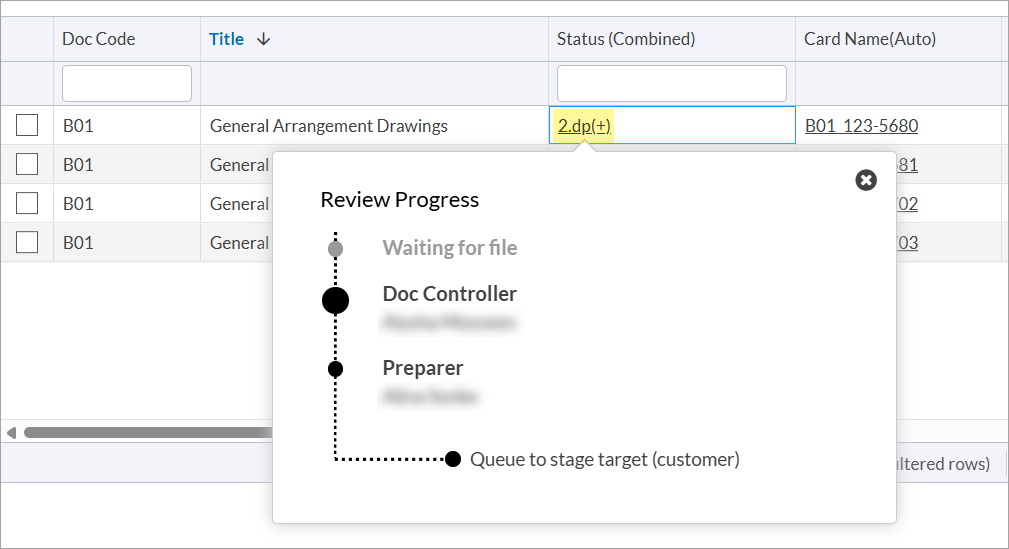
Example: 2.dp(+)
The document was received from the customer in status 2 (i.e., Approved w comments/Resubmit). It will be queued for submittal back to the customer (with return expected), but it must first be reviewed by the doc controller, followed by the preparer before it appears in the submittal queue.
| IFI | Issued for Information |
| IFR | Issued for Review |
| NIS | No Individual Submission |
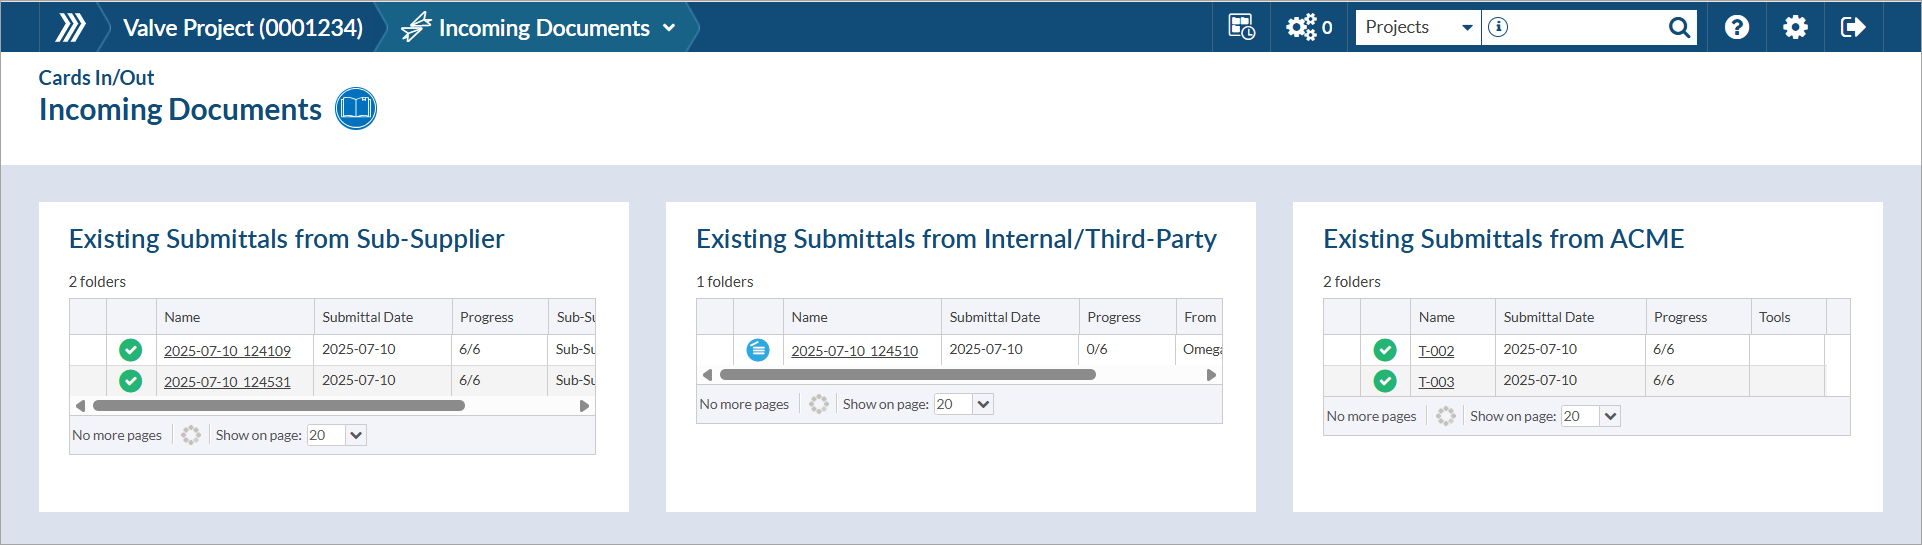
(Project Menu > Cards In/Out)
Reviewer users can view all incoming and outgoing documents.
For incoming, the submittals are separated by file source – from sub-supplier (left), from internal/3rd party (center), and from customer (right).
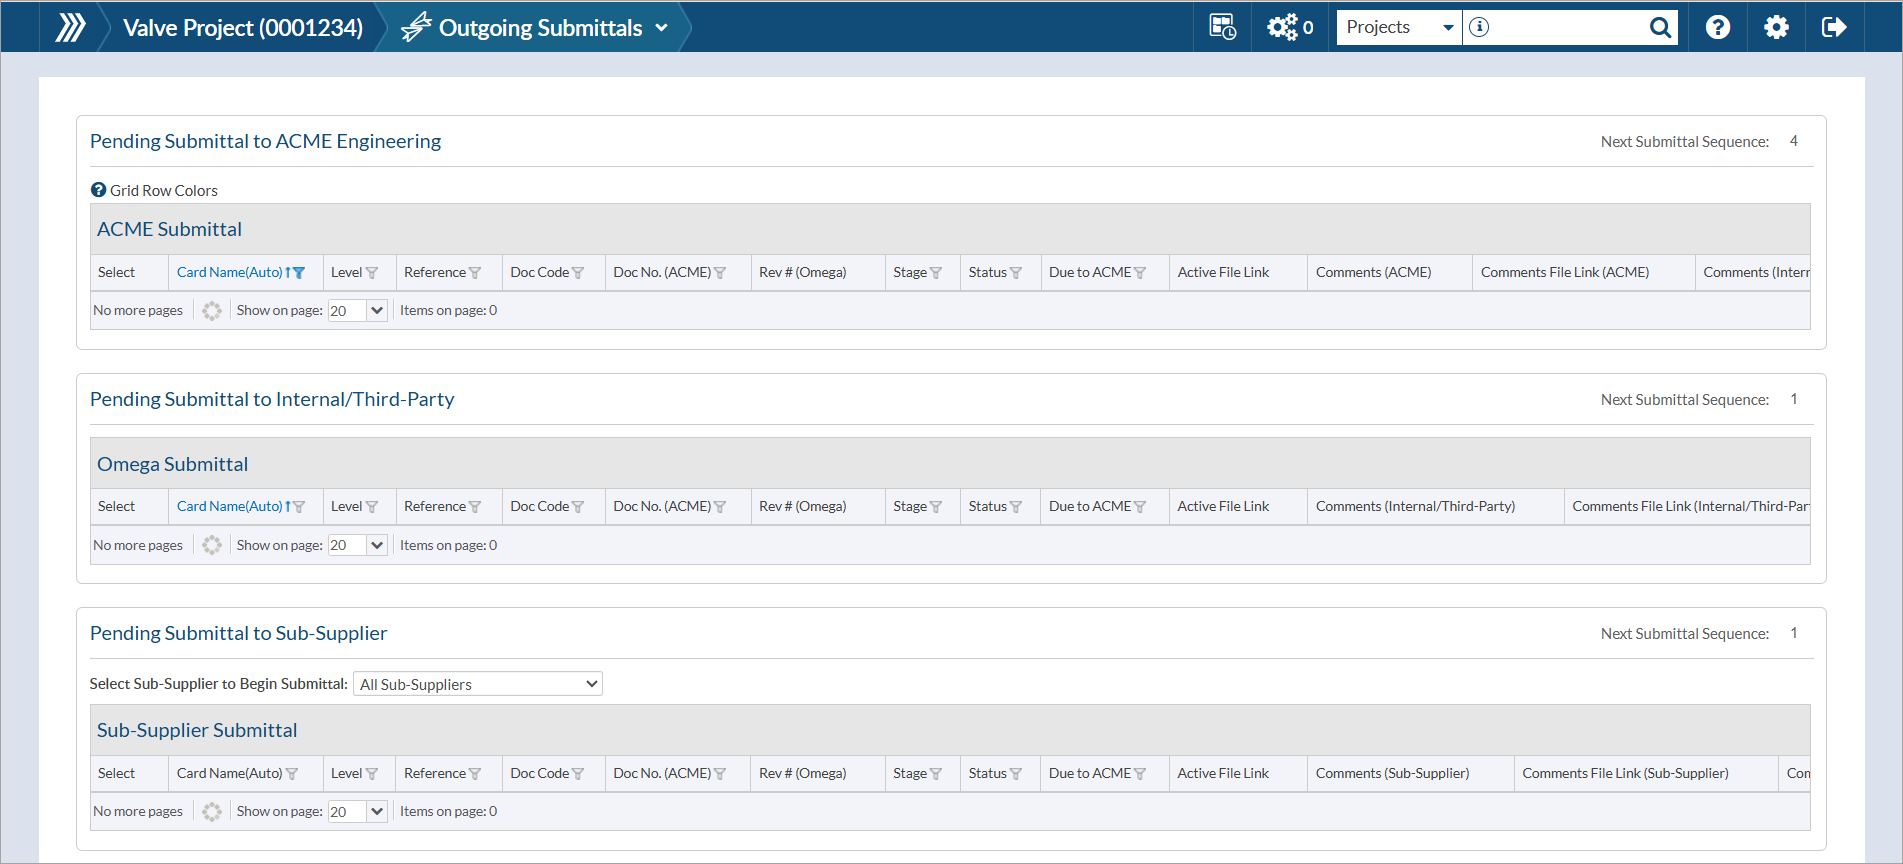
For outgoing, pending submittals are separated by queue – to customer (top), to internal/3rd party (middle), and to sub-supplier (bottom). Submittal history is also visible below the queues.
(Project Menu > Outstanding Actions)
Document controllers will be assigning documents for your review.
1. Open action by clicking on card name
2. Upload a new file (if required)
a. Drag the file directly onto the card in the grid
b. Open the card form and drag (or search for) the file using the “New File” drop-box

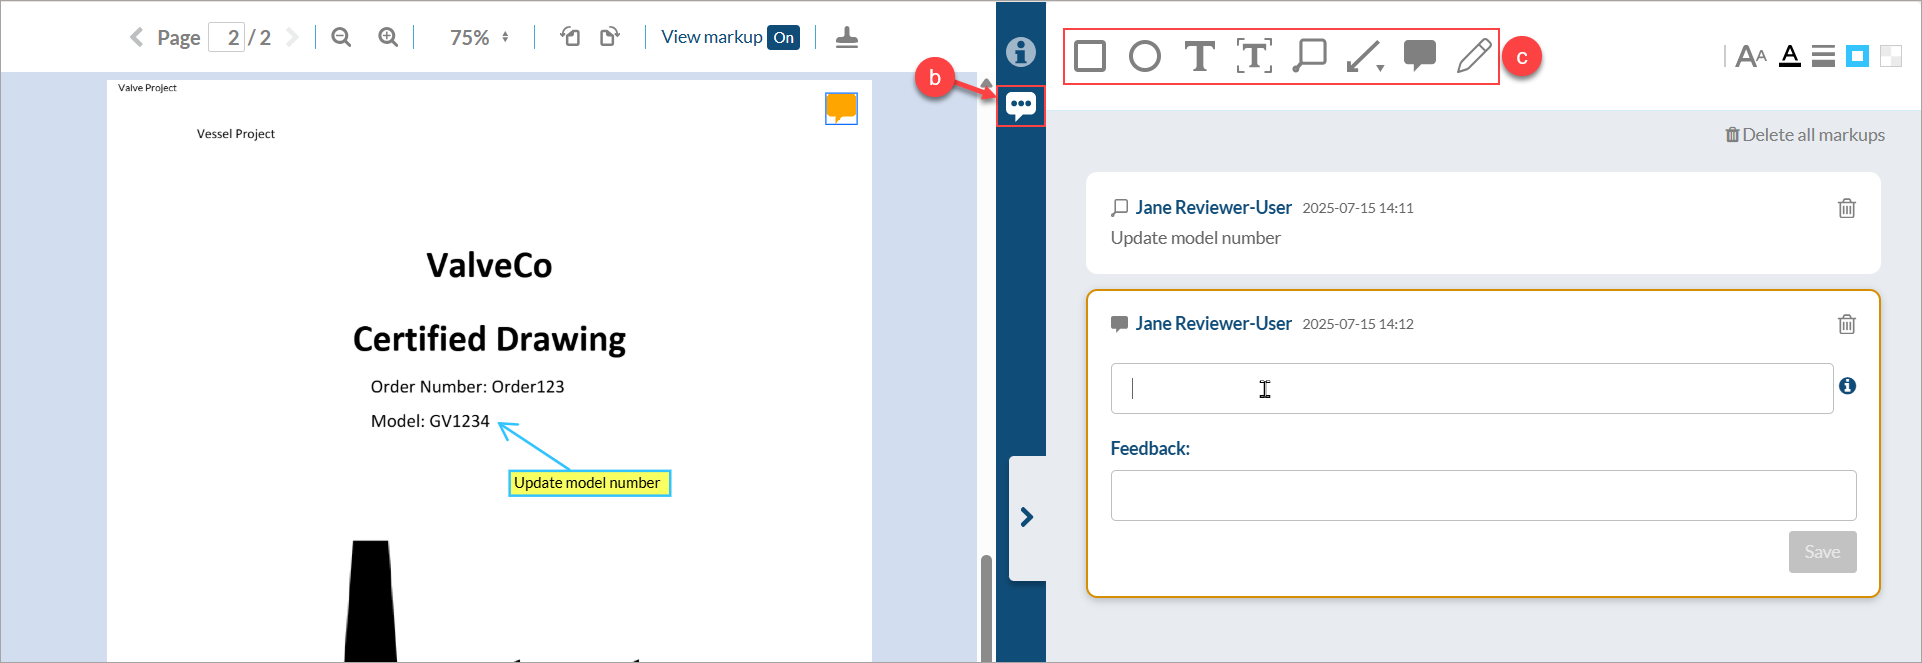
3. Add markup
a. Turn the viewer on
b. Switch to the markups screen (comment bubble icon)
c. Select the markup type you’d prefer and fill in the required information, clicking “Save” once completed.
Article: Markups on documents
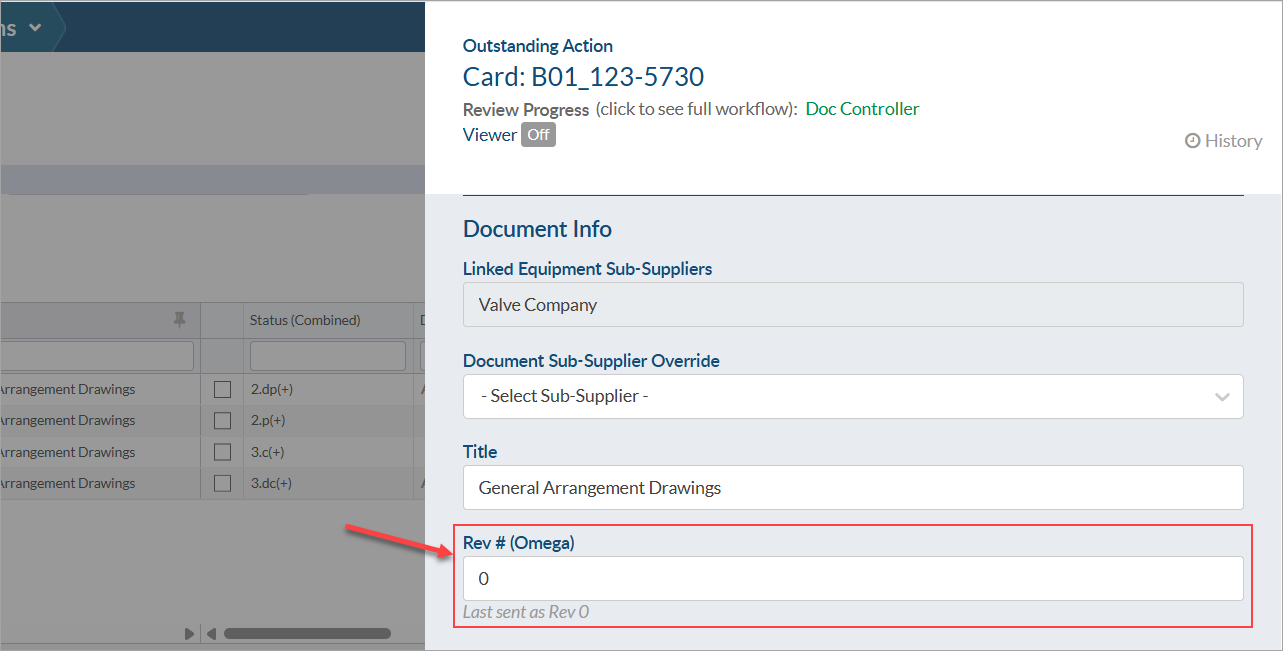
4. Update revision number. Scroll to the “Document Info” section and update the “Rev #” value
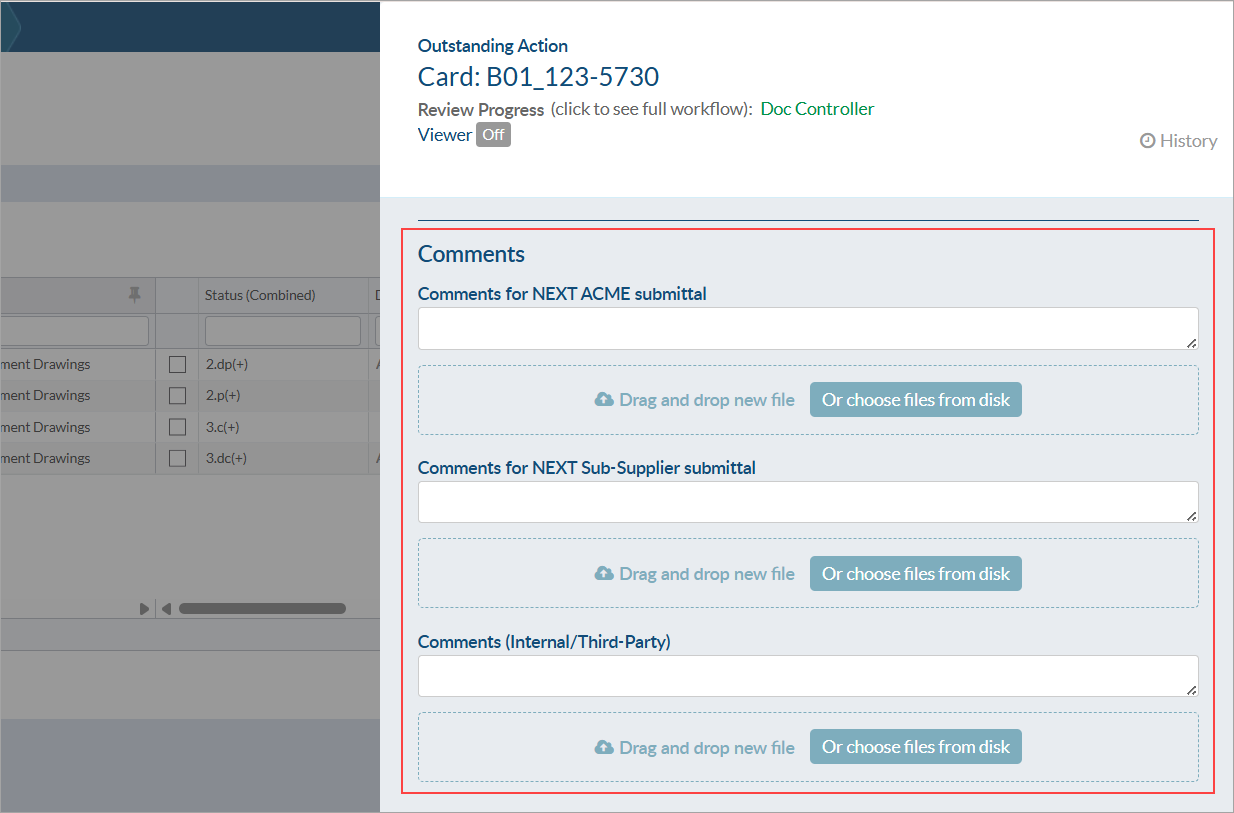
5. Add comment(s)a. Scroll to the bottom of the card form and add the comment to the appropriate field (i.e., comments to the customer, the sub-supplier, or just internally)
6. Save changes
a. Your “turn” (i.e., no actions to be completed before you)
i. To complete your action ⇾ “Complete action”
1. If a notification should be sent to inform someone of the completed action, choose “Complete action & notify”
ii. To save without completing action ⇾ “Save for later”
1. If a notification should be sent to inform someone of the progress, choose “Save for later & notify”
b. Not your “turn” (i.e., actions to be completed before you
i. To save your progress ⇾ “Save”
1. If a notification should be sent to inform someone of the progress, choose “Save & notify”
c. Article: Complete an outstanding action
If you wish to be notified immediately when an action is assigned to you, you can enable the action-related options on your profile (System Menu > Edit your profile > Email Notifications > Alert). Available options are:
If you wish to be periodically (daily or weekly) notified of your outstanding actions, you can enable the “Receive a list of my open actions” option on your profile (System Menu > Edit your profile > Email Notifications > Lists).
If you wish to be periodically (daily or weekly) notified of any status/stage changes, you can enable the “Send me a report showing all changes to status/stage” option on your profile (System Menu > Edit your profile > Email Notifications > Reports).
To view the document index (SDI), open the appropriate project, and navigate to Project Menu > Index Reports & Compilations. If it has already been generated, you can download it by clicking the .xlsx icon under the “Download” column. If it needs to be (re)generated, click the generate icon under the preferred export option (.xlsx or PDF).


DocBoss is the only true document control system for
suppliers. Book a quick demo to see how we help process
equipment suppliers make more profit with less pain.
DocBoss enables you to customize your EPC submittals right down to the font on the cover pages. But did you…

One of the most helpful features of DocBoss is its ability to track and monitor all changes made to documents…
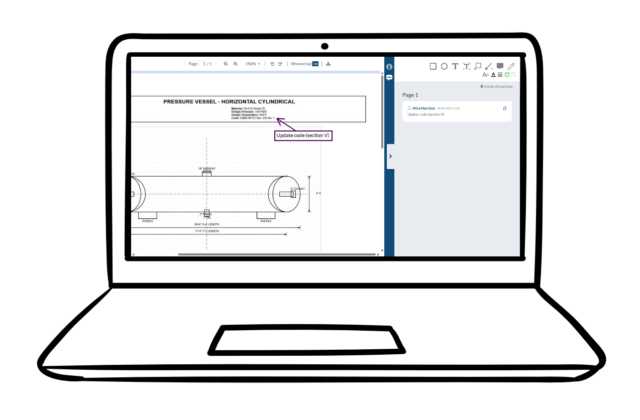
This video explains how to add and edit annotations using the document viewer in DocBoss.