
Product Updates
Configure Lenses on the Dashboard (DocBoss Filtering)
Did you know you can configure the lenses on the DocBoss dashboard to better filter information in a way that…

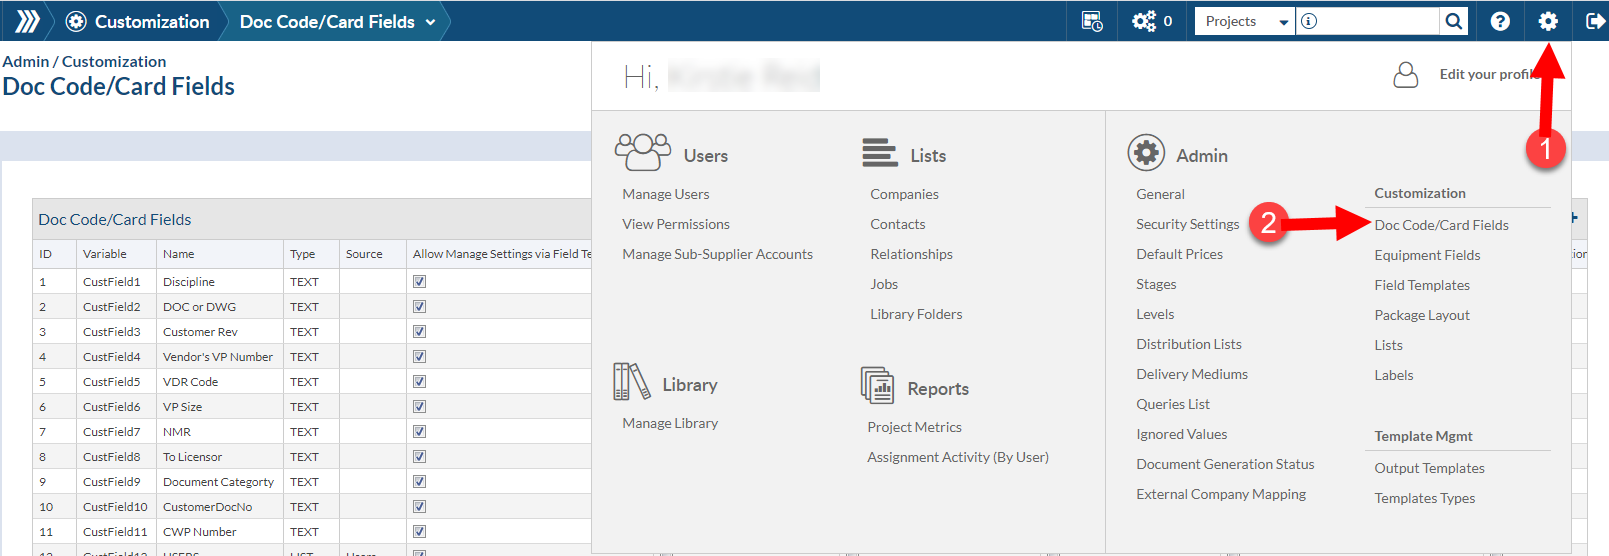
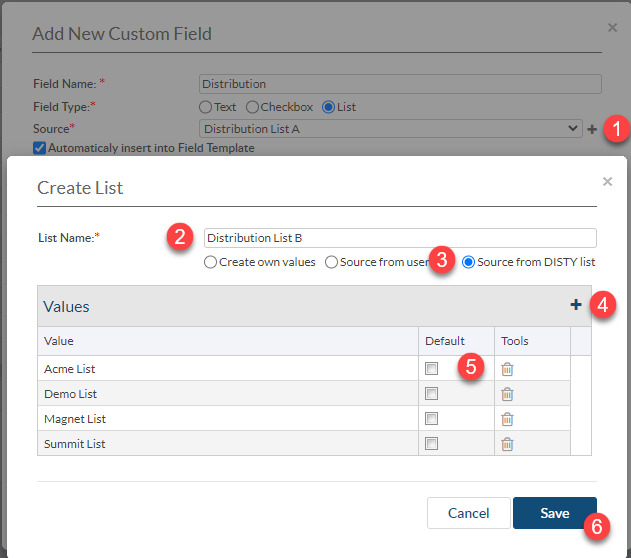
This article provides steps to set up and use custom fields where the type is “List”. Using a list takes out any risk of typos as it gives the user a list of pre-existing values to choose from, rather than typing in the values.
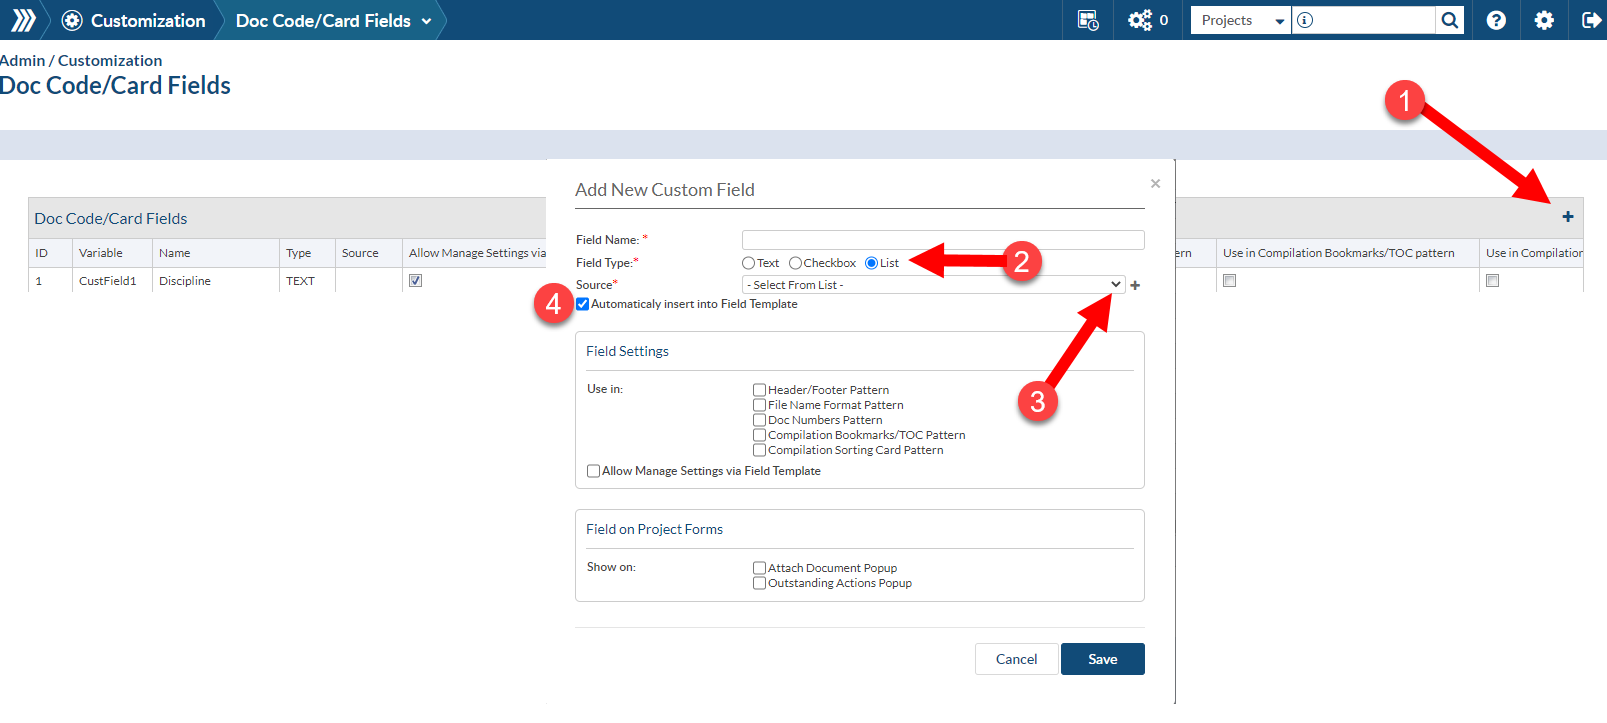
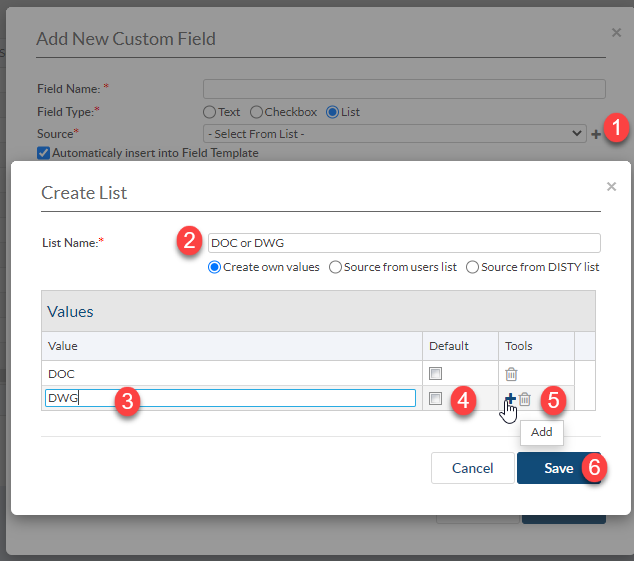
You have the option to select from existing lists or to create new . You also have the option to set a value of your choice as the default.
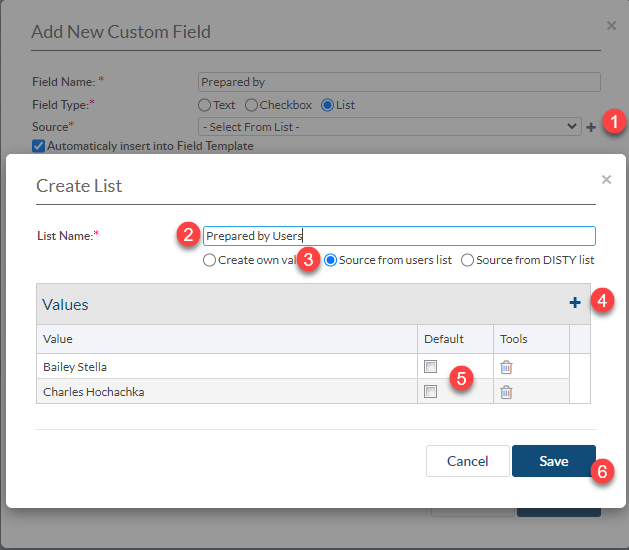
Not used often but if you had a Contractor / Engineering Partner this will allow you to choose their distribution list.
After adding the users and creating the new custom columns, the following steps are to enable the new fields on the Project Fields Template.
Once the Custom Fields have been created, you must enable them on the project using the Project Fields Template.
Navigate to your project then Project Hub > (Set Up) Project Fields Template

Scroll down to “Doc Code/Card Fields”
This will list all Custom Columns that have been created at the admin level. Now you can Enable or Disable accordingly to meet your project requirements.

Once you have made the changes, you can leave as is and columns will be applied to your project accordingly. You also have the option to “Save as New Template” or Overwrite Currently Selected Template. By saving the template, (new or overwrite) it will allow you to select for future projects so that you do not have to modify manually each time.
For more information about creating and enabling custom fields on your project, see our article: Add Custom Doc Code/Card Fields.


DocBoss is the only true document control system for
suppliers. Book a quick demo to see how we help process
equipment suppliers make more profit with less pain.
Did you know you can configure the lenses on the DocBoss dashboard to better filter information in a way that…

DocBoss makes it easy to enable Multi Factor Authentication (MFA) with a few clicks of your mouse. Here’s how it’s…
A Status List is the approval statuses that are used by your customer to indicate if a document will be…