
DocBoss Project Table of Contents Templates
In some projects, the table of contents template requested is project specific. For these situations, instead of using the default…

We’ve spoken about this topic in the past but here is some updated information on how to Add Custom Equipment Fields to a project.
You may now add an unlimited number of global and project specific equipment fields.
When you set up global equipment fields they can be used in all your projects. The variables will remain constant, so you can create standardized templates which rely on these values.
To manage global fields: Navigate to Settings (Gear) > Customization > Equipment fields.
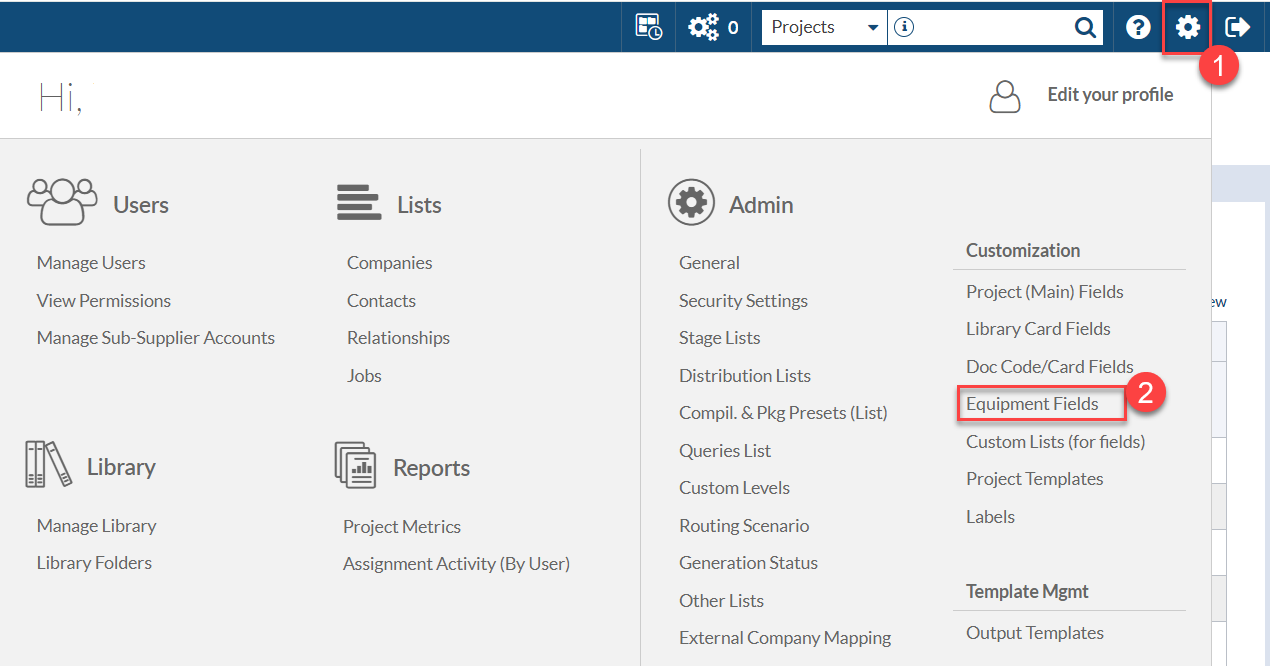
Here you can:

1 – Add as many custom columns as you need by clicking the Add button
2 – Change the name of the existent custom fields (i.e. Product Group in Custom1)
3 – Select to automatically add any custom field to all new project field templates
Once the equipment fields have been created, these have to be enabled in the Project Template.
To enable the fields for NEW Projects only, navigate to Navigate to Settings (Gear) > Customization > Project Templates and click on your Project Template.
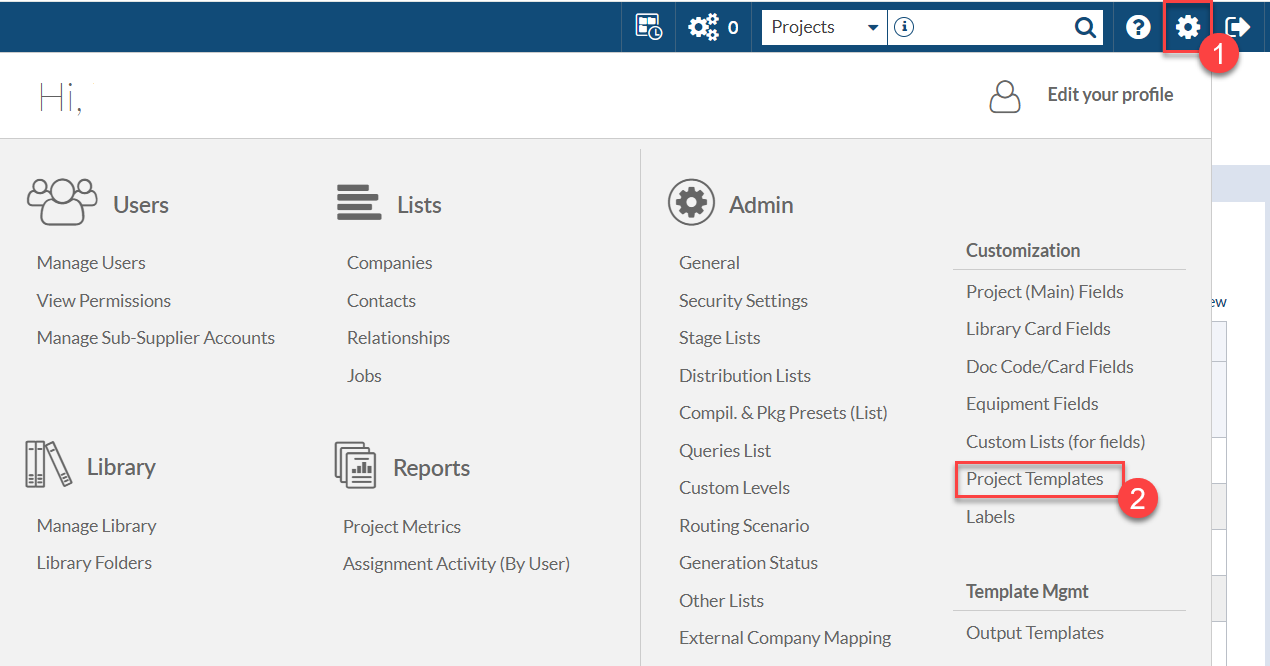

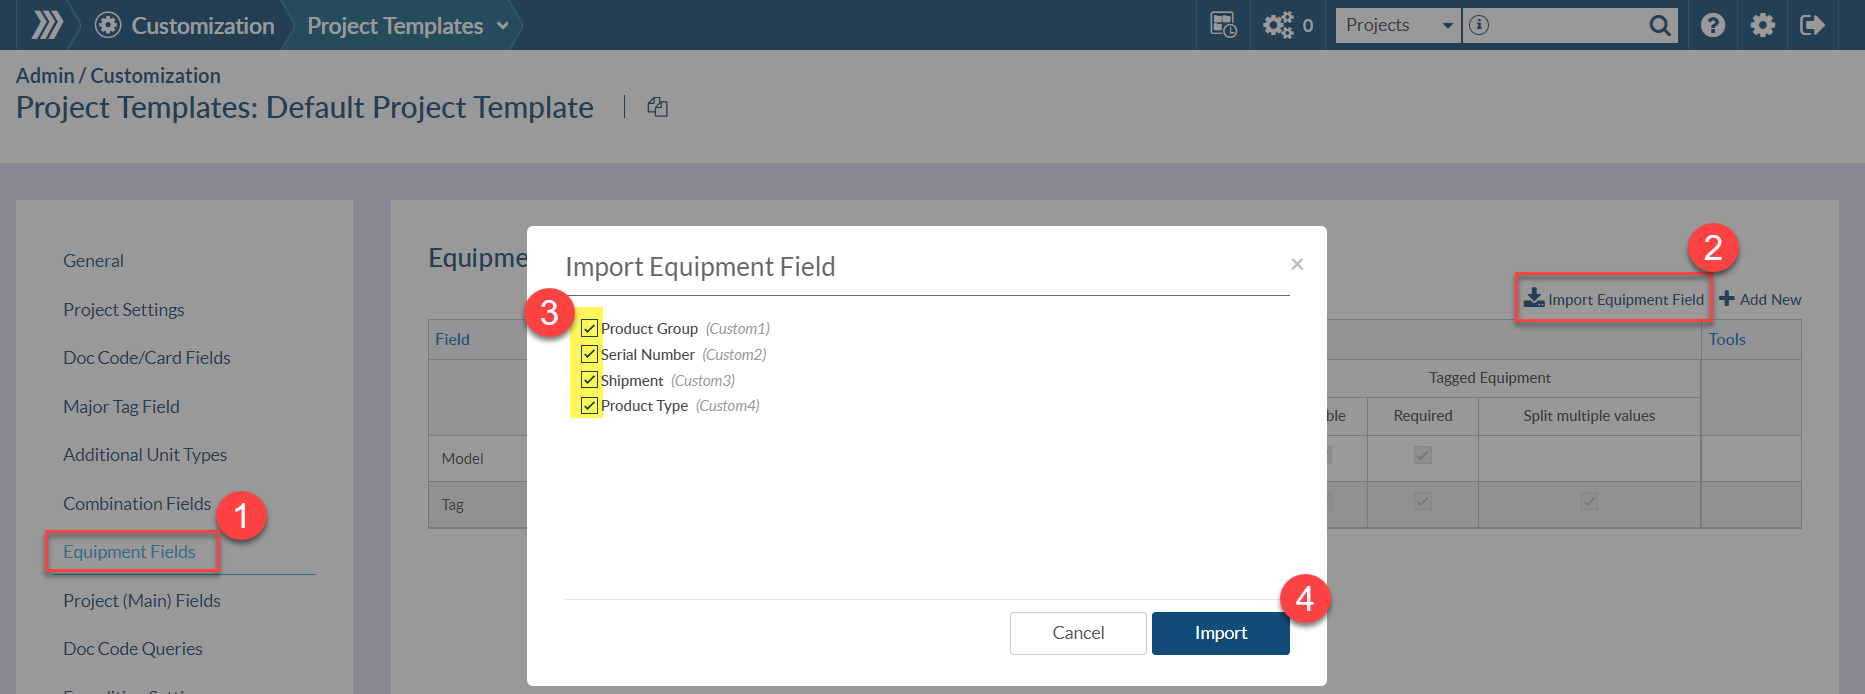
Here navigate to Equipment Fields section > click on Import Equipment Field > select the custom fields you wish to add and click on Import.
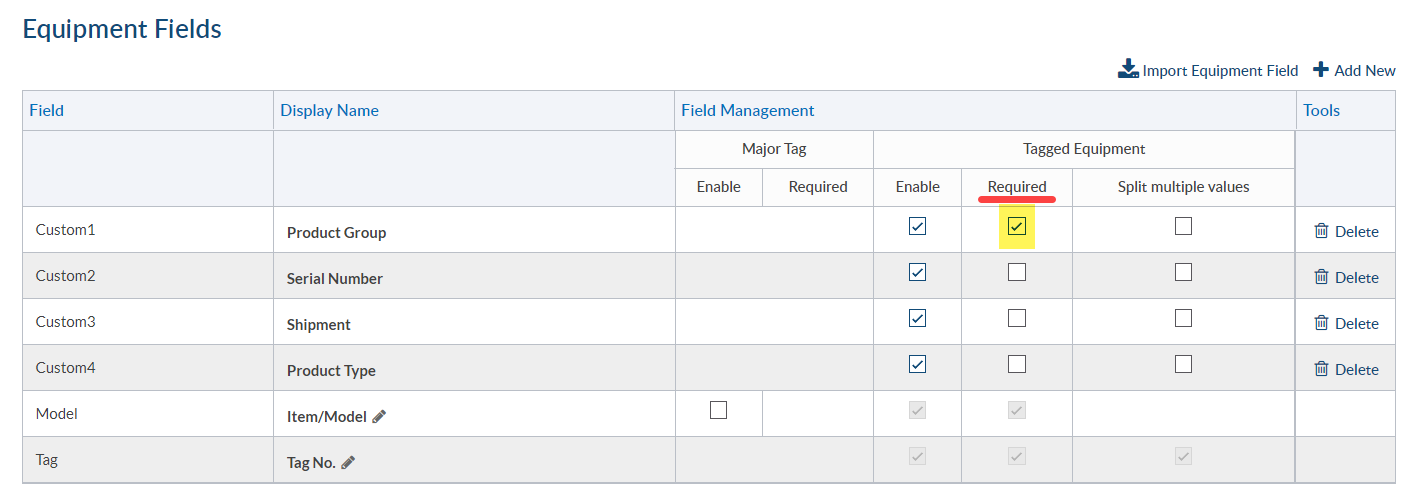
Once the custom fields are added to the grid they should be Enabled.
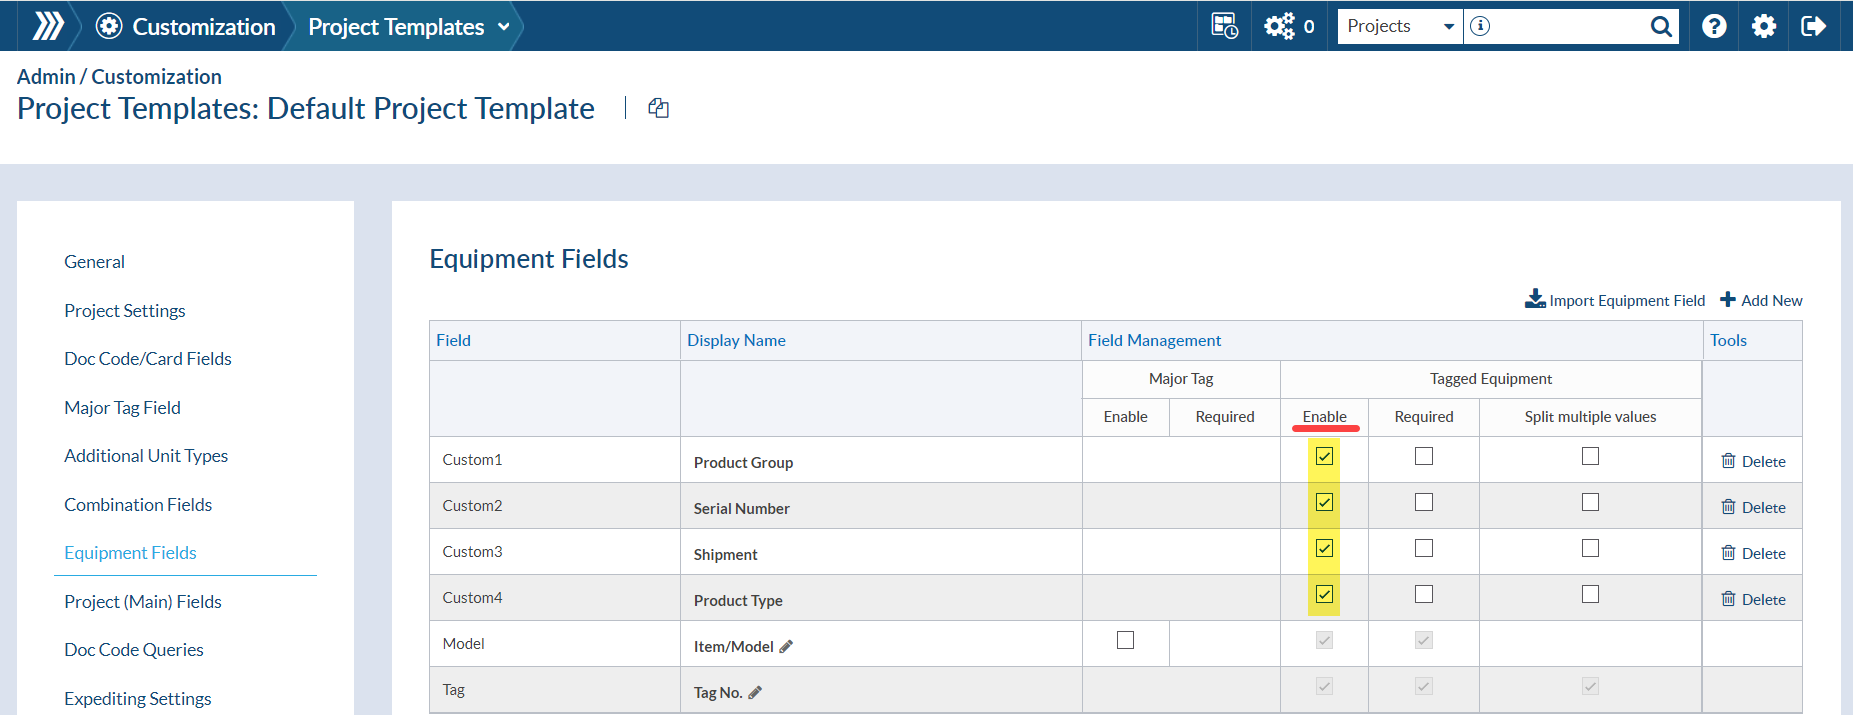
Optionally there is also the option to set them as requested and make the field mandatory when adding the equipment units.
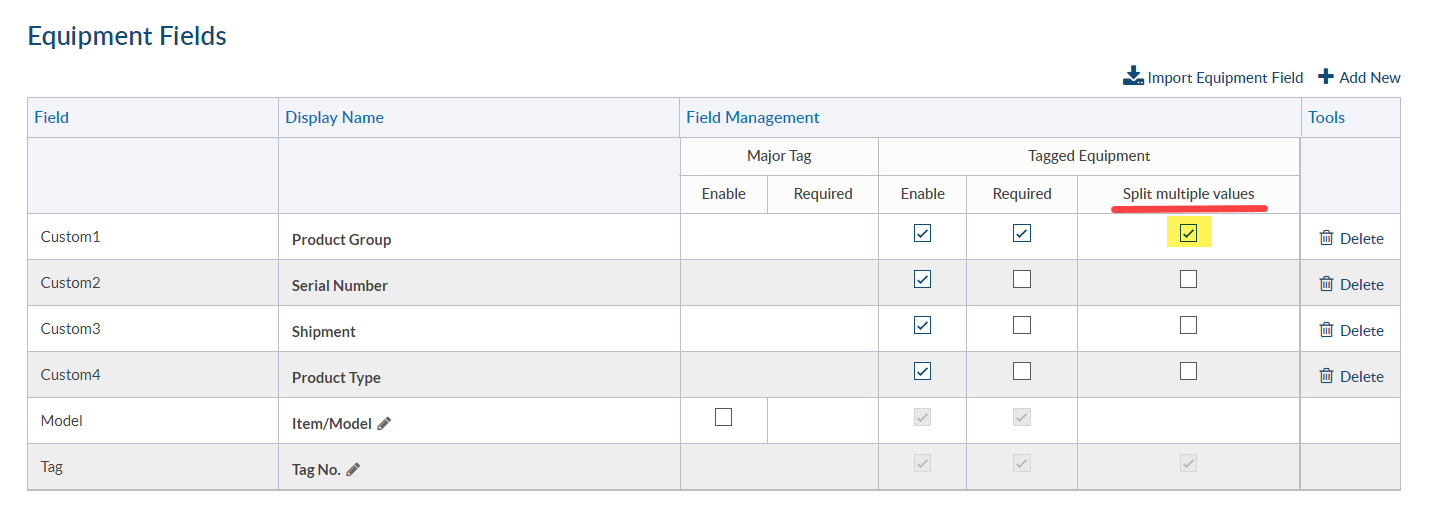
And also enable Split Multiple Values when using Multiple Quantity Upload option.
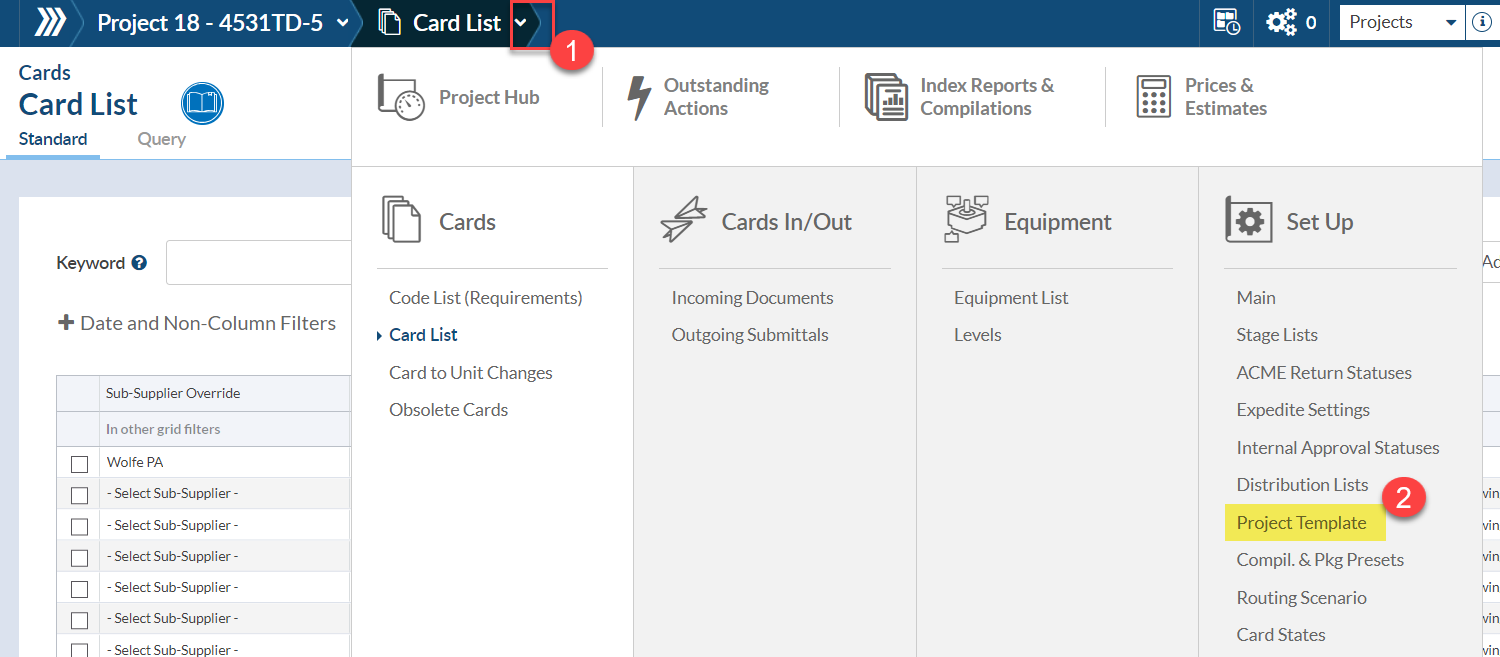
To enable the fields on EXISTING Projects, navigate to your Project > click on the Project Menu > Project Templates.
Here follow the steps included above in Enabling the Equipment Fields for New Projects section to import and enable (and optionally set as required and split multiple values if needed).
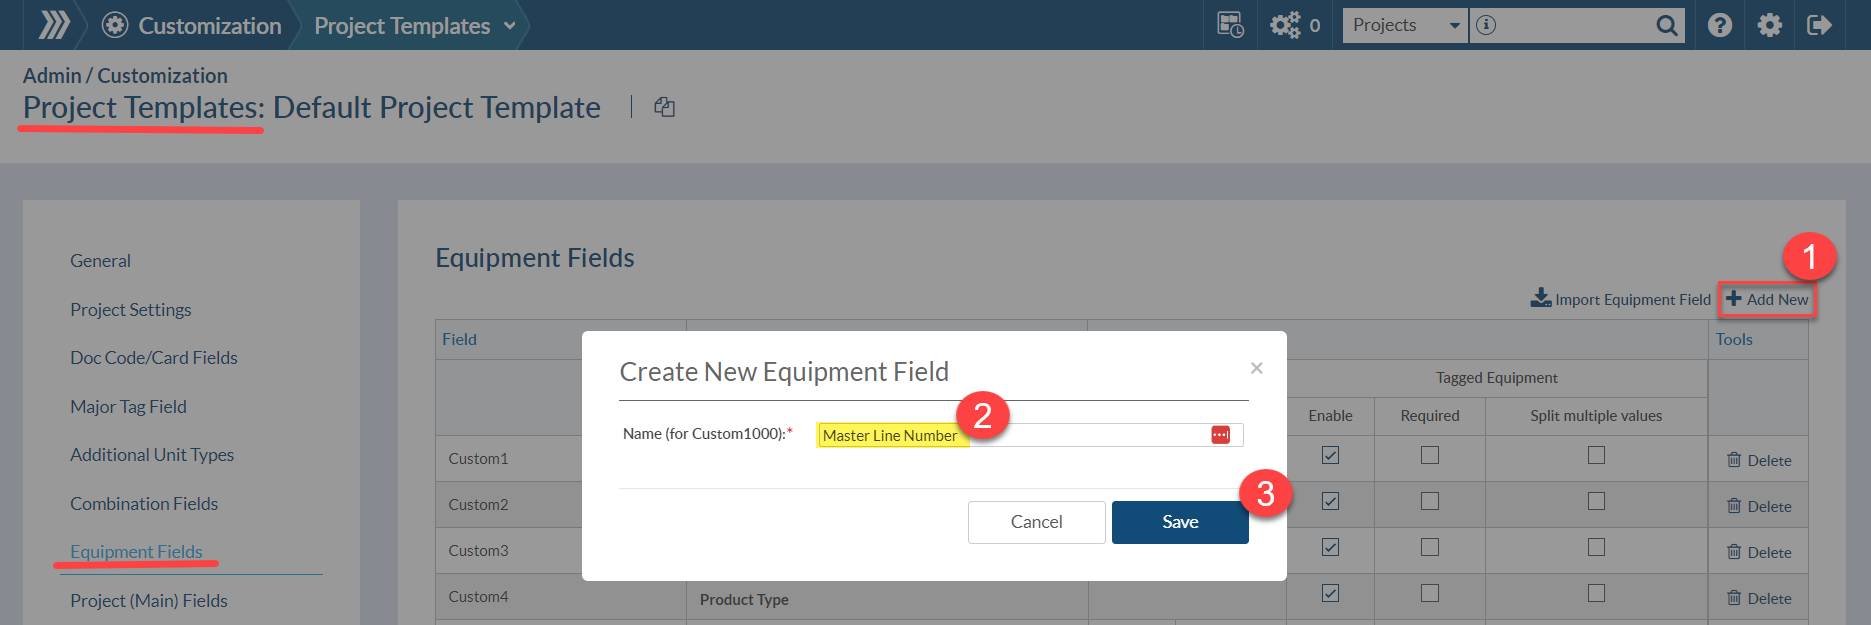
The ID of the equipment fields added directly to the Project Template project equipment field starts at Custom1000. This will help you to difference between Global Equipment Fields and specific Project Equipment Fields.
These Project Equipment Fields, can be added to the Project Template at admin level and they will be included in new Projects or they can be added in the Project Menu and will be applied only to the existing Project. Keep in mind that once the fields are added, these have to be always enabled (and optionally set as required and split multiple values).
When there are changes applied to the Project Templates in the Project Menu, there is also the possibility to save back to Admin Project Template:

Or even save as a new Admin Project Template which can be re-used on future Projects.

Equipment List – is where you can enter/edit the values
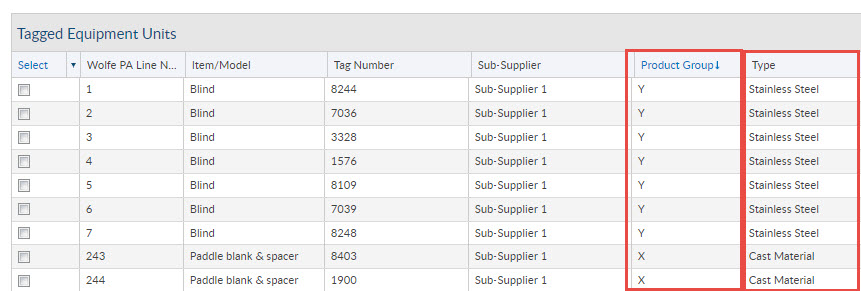
If you look at the card list – you will see the list of custom values related to the card. It shows the unique values from all linked equipment.

In each case, these fields can be put onto templates using the variables based on their ID’s: i.e. CustomX and CustomX_List
And if you’d like this info in video form, check out this article next: Adding Custom Equipment Fields In DocBoss (Video)
DocBoss is the only true document control system for
suppliers. Book a quick demo to see how we help process
equipment suppliers make more profit with less pain.