
Product Updates
Overview Of DocBoss User Levels And Access
User roles are default permission sets available to users. To limit individual users’ access beyond their default role access limits,…

If an existing collection of library documents need to be transferred to a new instance, this can be done by exporting from the currently library and importing into the new library.
For instructions on adding new files to the library, see this article: Library Documents.
To retrieve the list of library document types from the current instance, navigate to System Menu > Library > Library Document Types and save the data in a spreadsheet or word document (copy/paste).
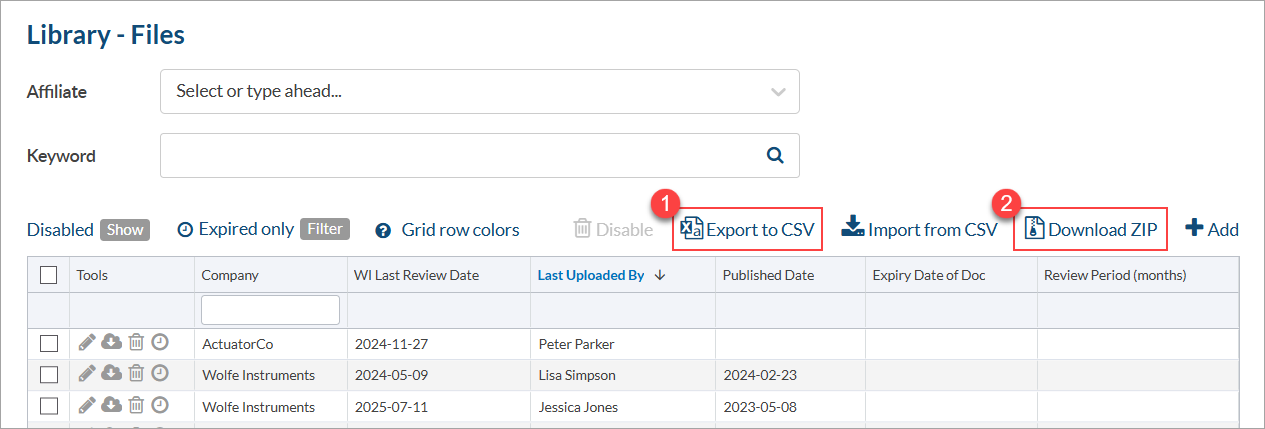
To export library files from the current instance, navigate to System Menu > Library > Manage Library. Above the library files grid, select the option to “Export to CSV” to download the metadata associated with the library files. Once download, select the option to “Download ZIP,” which will bulk download the actual files.
To add the list of library document types in the new instance, navigate to System Menu > Library > Library Document Types. Using the data saved in the spreadsheet/word document previously created, manually add the document types (see article: Library Documents)
To import library files into the new instance, navigate to System Menu > Library > Manage Library and drag and drop the previously downloaded ZIP file into the “Inbound Documents” drop box.
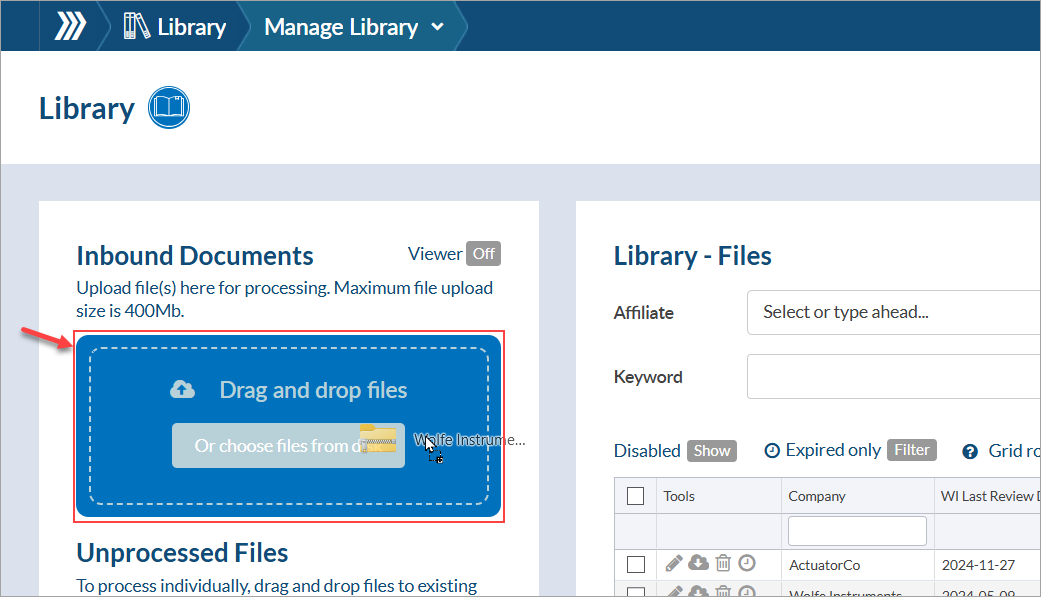
If the ZIP file is over 400MB, extract the files locally and upload them via the “Inbound Documents” drop box individually.
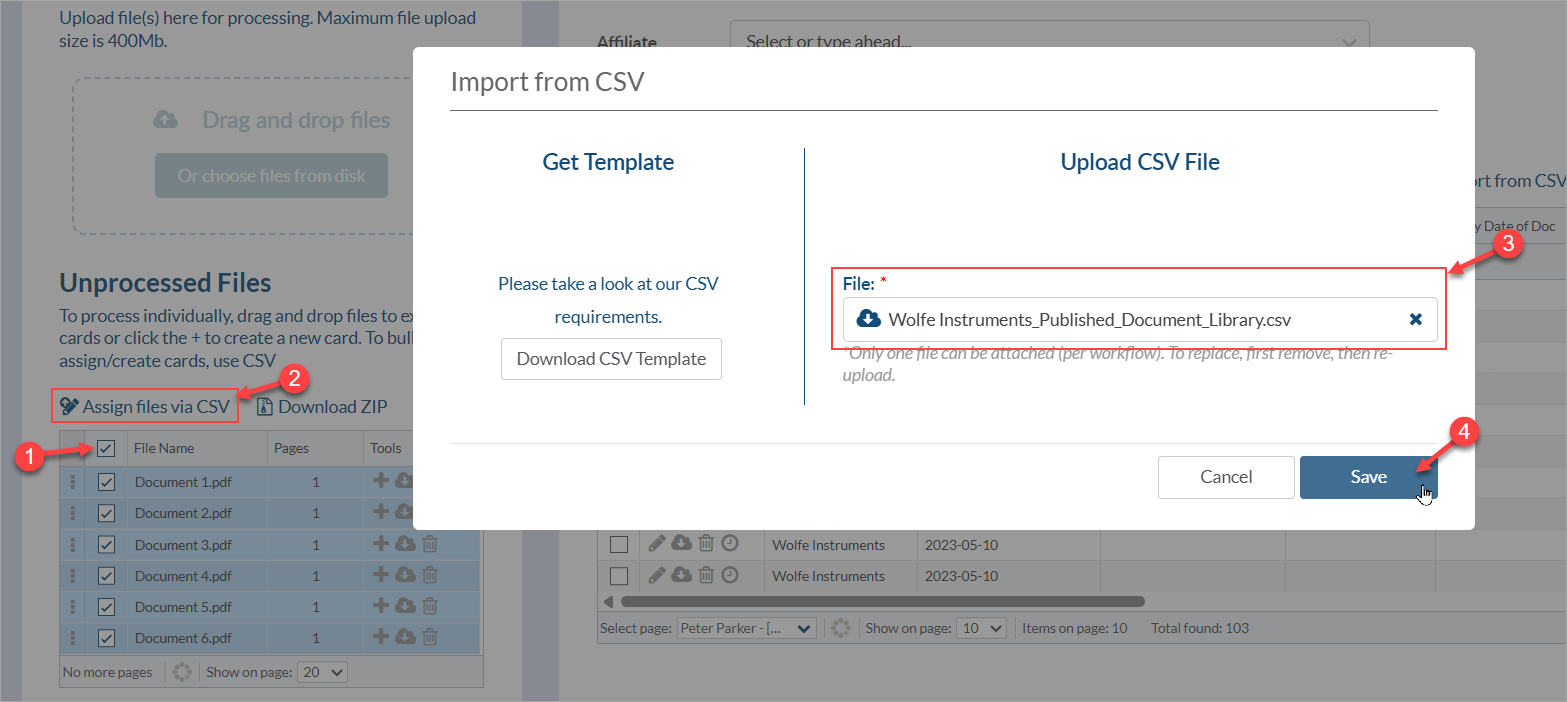
Once the files have been processed, select them (using the “Select All” button) and choose the option to “Assign Files via CSV.” From the popup, upload the previously exported CSV file containing the library document metadata, and select “Save” to process the changes.


DocBoss is the only true document control system for
suppliers. Book a quick demo to see how we help process
equipment suppliers make more profit with less pain.
User roles are default permission sets available to users. To limit individual users’ access beyond their default role access limits,…
Assign active, native AND comment files from the file staging area (multi drag/drop) When assigning files, if the user multi-selects…

Internal approval is often of interest to companies who are doing some engineering work on behalf of their customer. They…