Product Updates
Select Cover Page Templates and Settings on Project
We have plenty of topics that we’ve written about on this site regarding the use of templates within DocBoss to…
In some cases, customers require that stamps are placed directly onto the document, rather than, or in addition to a cover page. DocBoss allows users to upload stamp templates, and stamp documents.
The same variables as used on cover pages can be used in stamp templates.
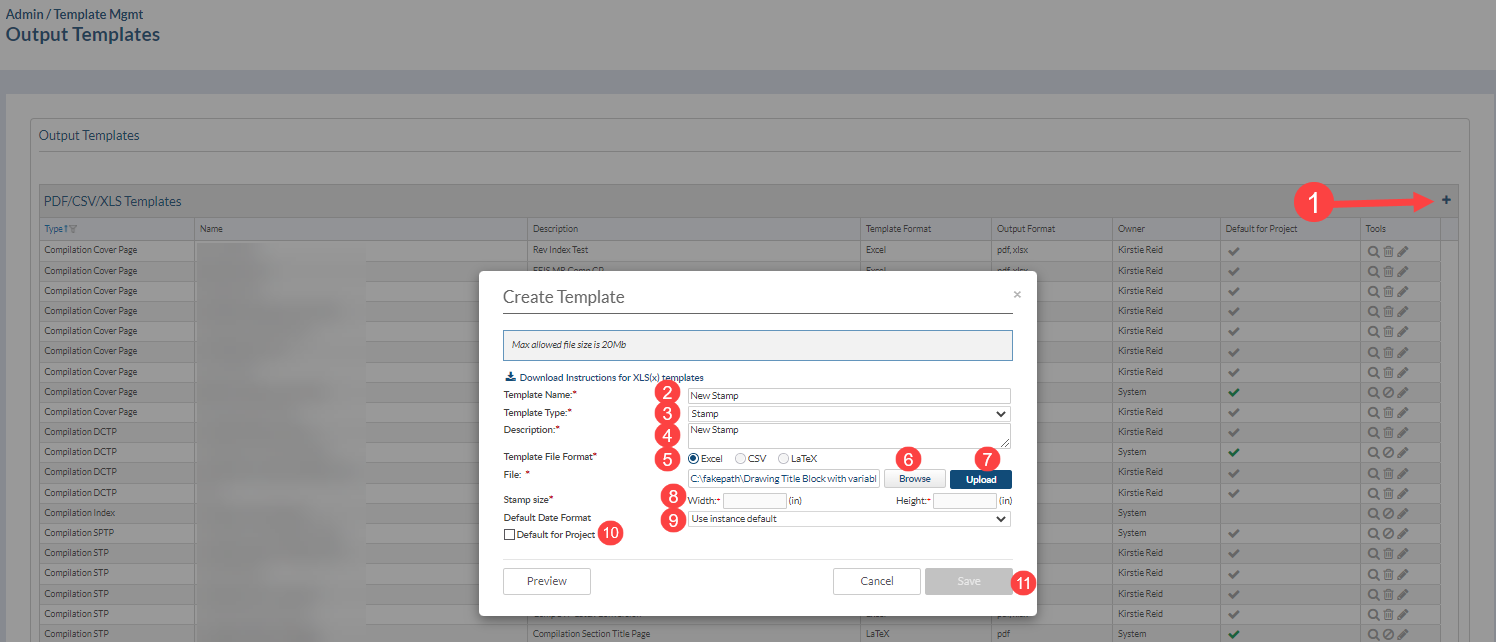
(*Note on the excel template do not center on page)
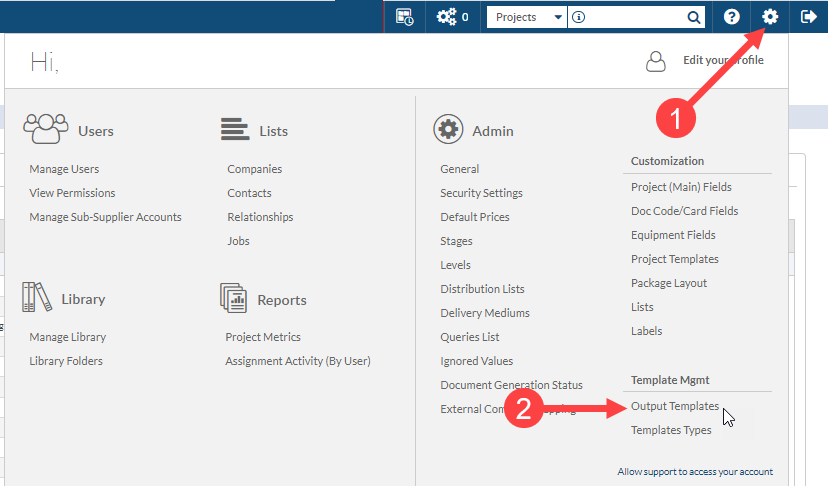
Navigate to Output Templates
NOTE: On submission, DocBoss will notify the user if the data filled stamp will occupy a larger space than the default size. This can occur if a field has “auto height” to accommodate variable tag lists.
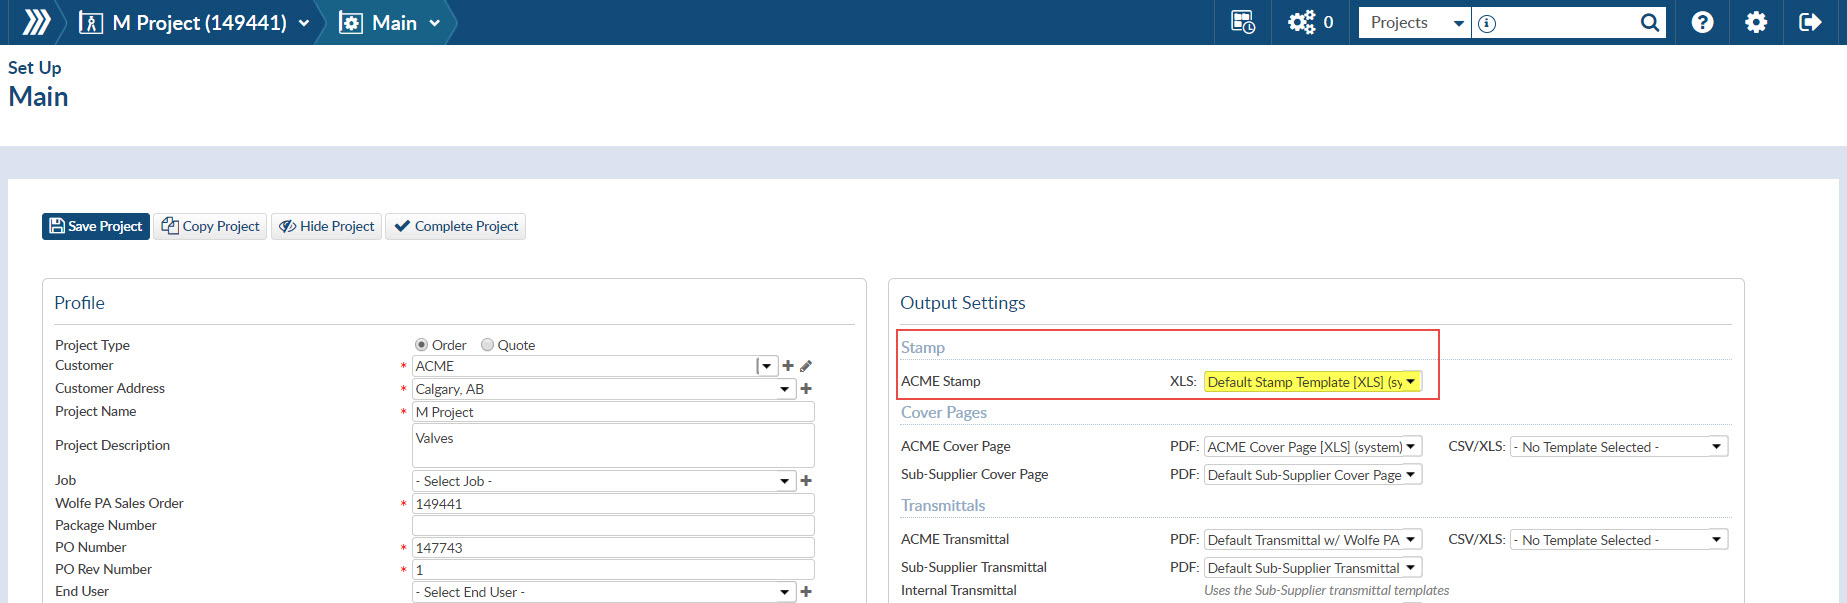
A new option is available in the output settings area of the Main project setup. To use a stamp on a project, you must select the stamp here.
Click here to read our article about cover page/stamp preferences on each doc code.
Click here to check out our article about applying stamps on your documents.
We’ve also written an article on the subject of Adding Markups On Documents With DocBoss, too.
Here is another article that might interest you regarding output docs: Customizing Output Documents In DocBoss


DocBoss is the only true document control system for
suppliers. Book a quick demo to see how we help process
equipment suppliers make more profit with less pain.
We have plenty of topics that we’ve written about on this site regarding the use of templates within DocBoss to…

We’ve already covered a number of template-related topics on this blog including email templates, project templates, and SDI templates among…
A great benefit of DocBoss is how manual tasks normally associated with the document control function can become automated. One…