
Product Updates
Working With Custom Levels in DocBoss
What is a level in DocBoss? The Level is an attribute that DocBoss uses to group data from the Equipment…

DocBoss enables you to customize virtually any aspect of your document control work to meet the specific requirements of your EPC customers. You can also customize the inputs as required to meet these requirements.
You can add custom fields to your cards. Here’s how to create and manage them in DocBoss.
The initial set up of the custom Doc Code / Card Field must be done by an Admin User. Once created, they can be enabled or disabled on any project.
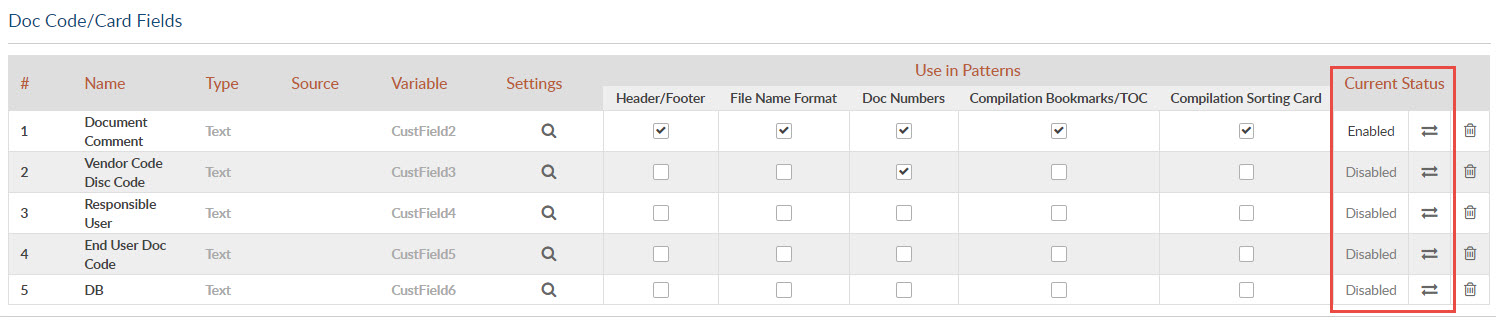
To Get Here: Admin> (Customization) Doc Code/Card Fields
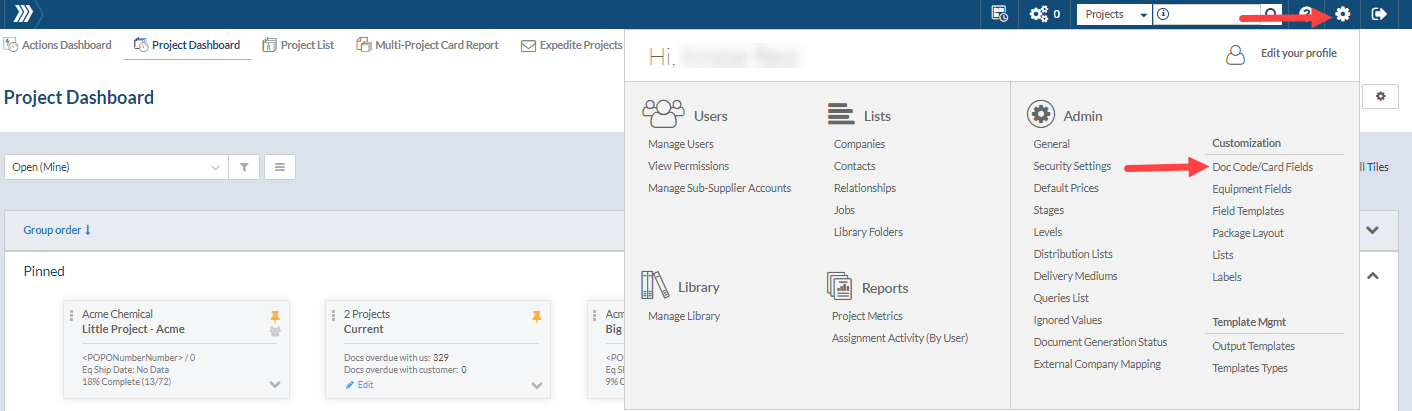
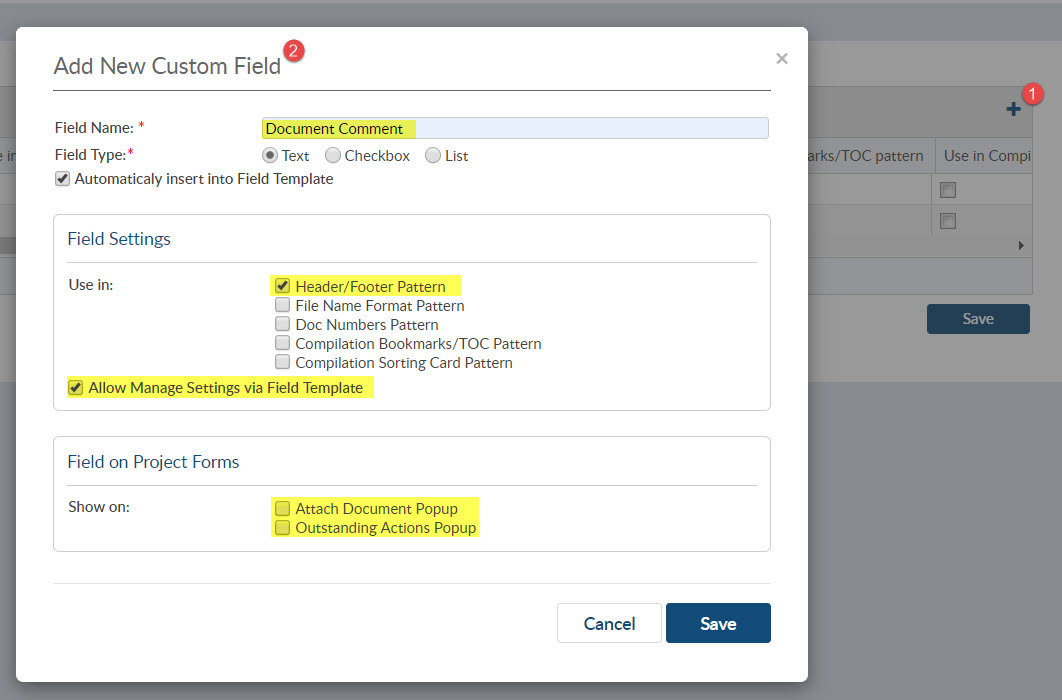
You will then need to ADD (1) your field and customize it accordingly
Once the Custom Fields have been created, you must enable them on the project using the Project Fields Template.
Navigate – Project Hub > (Set Up) Project Fields TemplateScroll to “Doc Code/Card Fields”
This will list all Custom Columns that have been created at the admin level. Now you can Enable or Disable accordingly to meet your project requirements.
Once you have made the changes, you can leave as is and columns will be applied to your project accordingly. You also have the option to “Save as New Template” or Overwrite Currently Selected Template. By saving the template, (new or overwrite) it will allow you to select for future projects so that you do not have to modify manually each time.
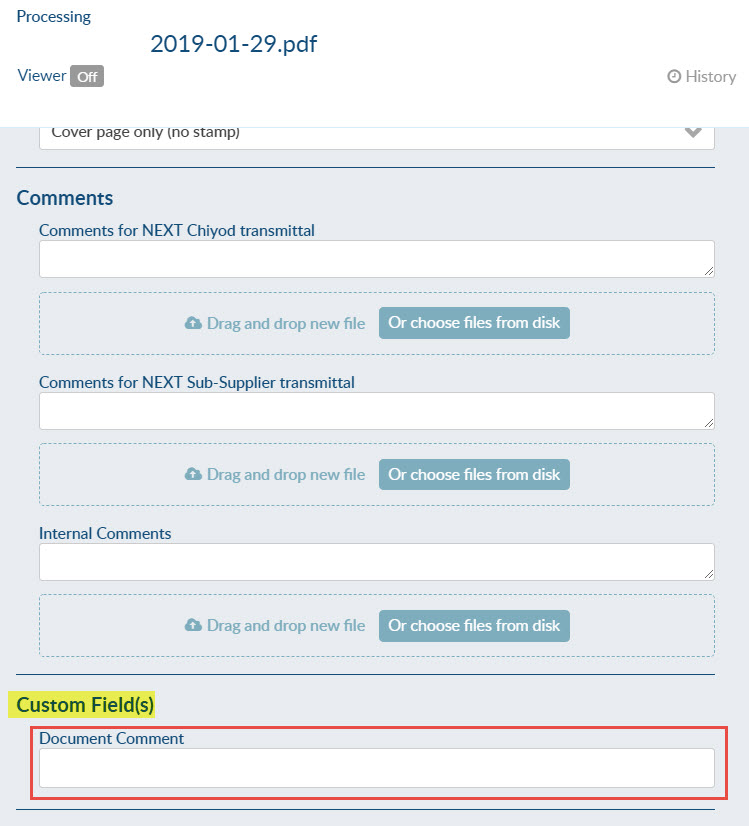
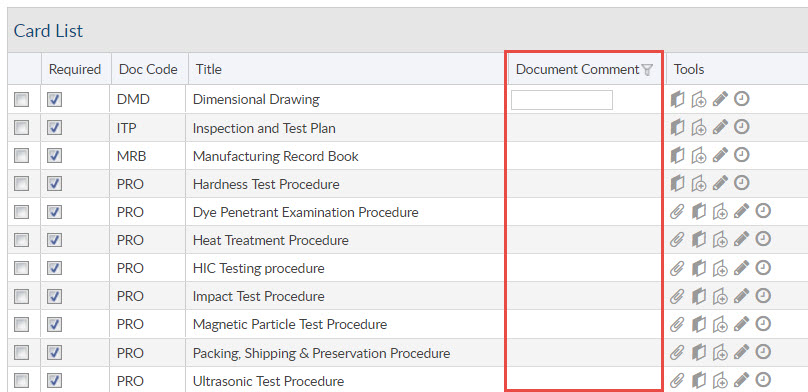
In the screen above it shows the “Document Comments” enabled. So lets see where you would find this field on your project.
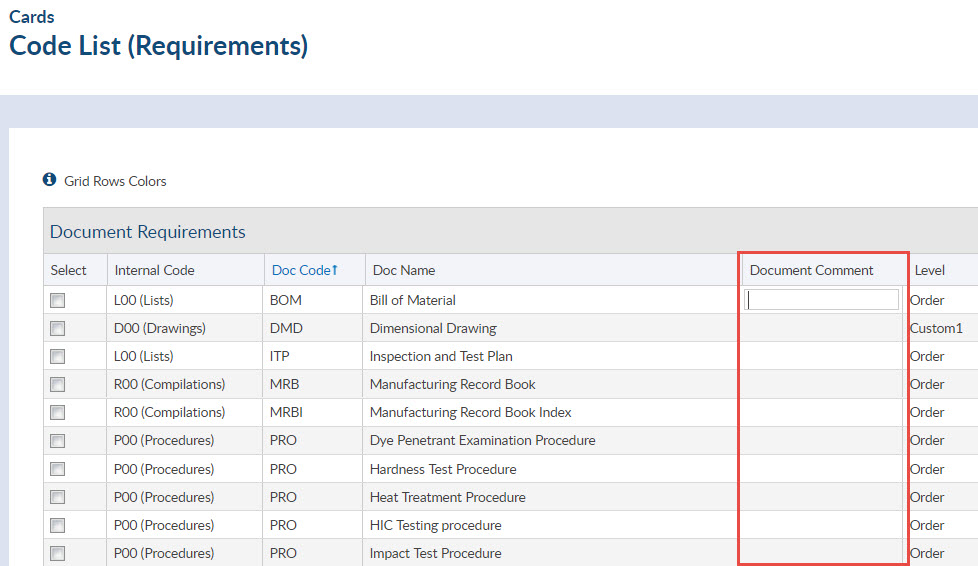
Card List
Assign(Edit) roll in screen
Outstanding Actions

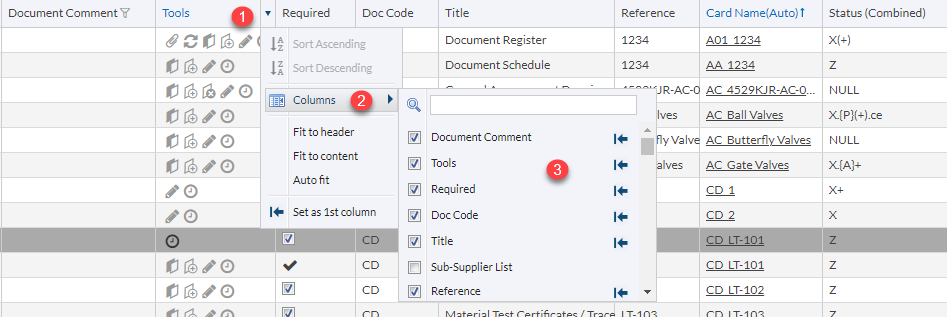
NOTE:
If you can not find the column on a specific grid, be sure that it is enabled to view.
1. Mouse over any column Header and click the down arrow 2. Scroll across the word “columns” until the selections become visible. 3. Anything that is checked off will appear in your grid. (Clicking on  will bring that column to the far left of the grid)
Looking for more examples of DocBoss customization options? Here’s another article we’ve written on how to change file naming: Changing The Outgoing File Name Format As Required


DocBoss is the only true document control system for
suppliers. Book a quick demo to see how we help process
equipment suppliers make more profit with less pain.
What is a level in DocBoss? The Level is an attribute that DocBoss uses to group data from the Equipment…

In DocBoss a compilation is the final submission that you send to your EPC customers at the end of a…

DocBoss was designed by people who know your business. We understand what pain points document controllers face each day and…