
Blog
Oil Market To Recover Later in 2021
Happy New Year! After a year dominated by COVID headlines, most people around the world wonder what 2021 has in…

Upon receiving the return of a DocBoss created package, users can automate the re-allocation of each document to its original card.
To review how to create packages with DocBoss, click here.
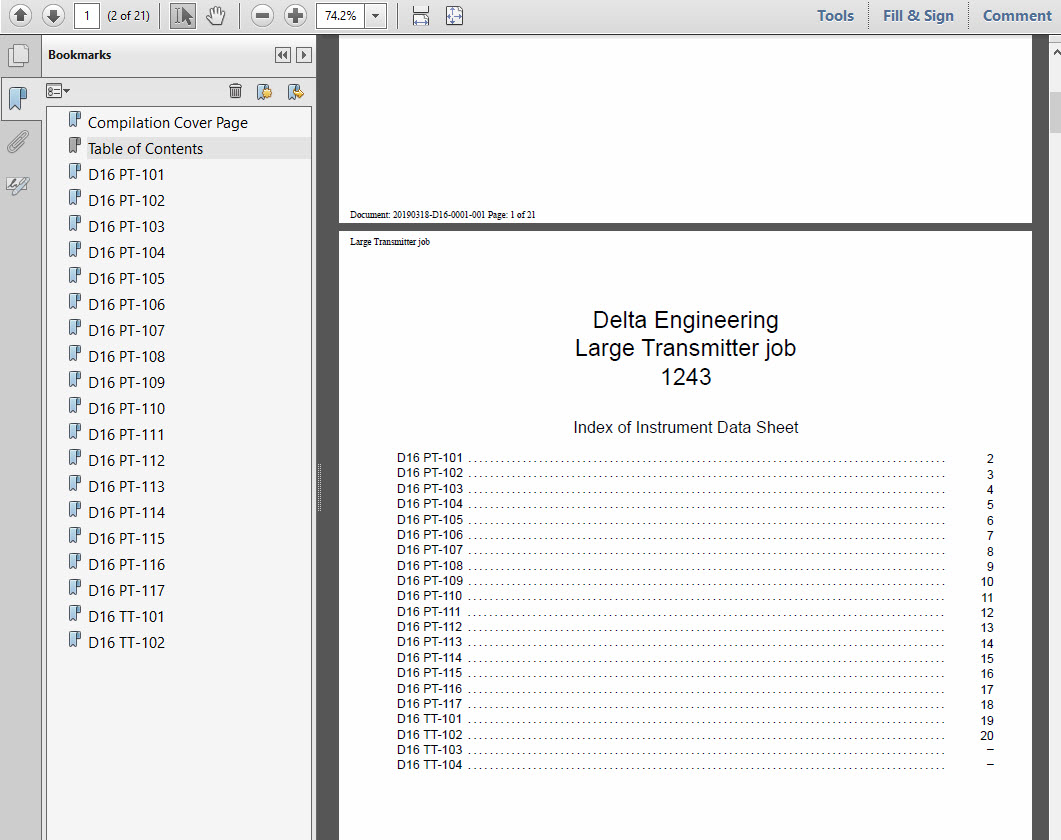
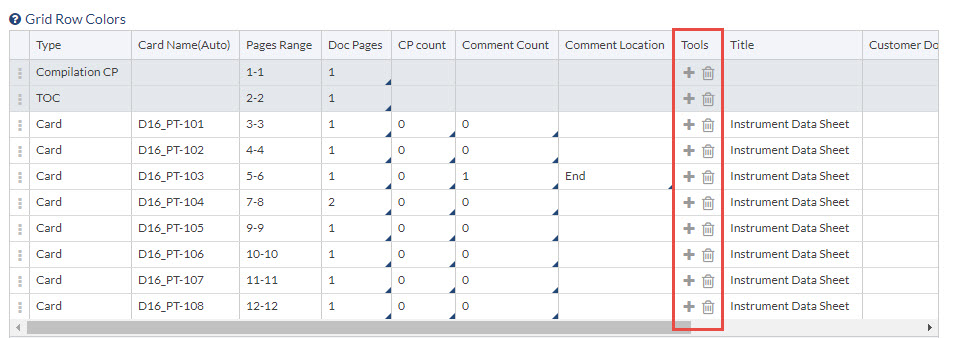
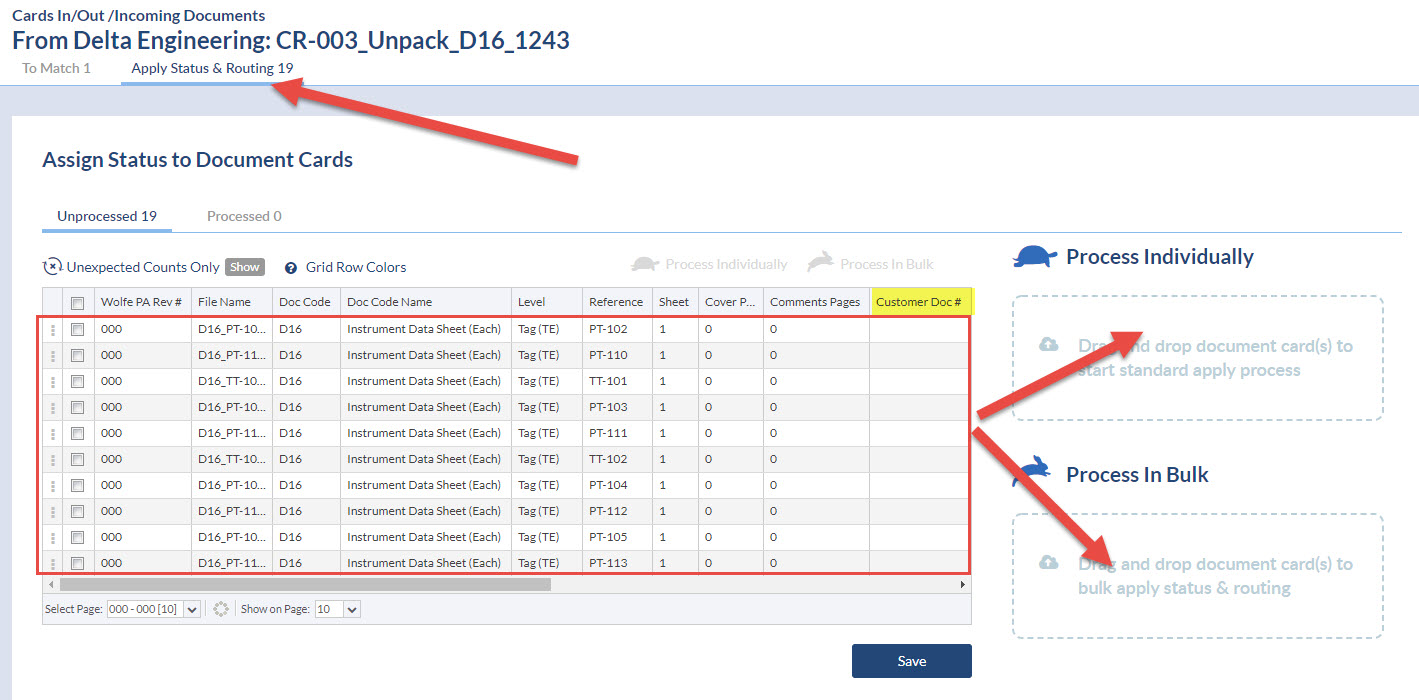
Here is the screen shot of the PACKAGE sent to the customer.
Follow the normal steps to being the package card into an incoming submittal. Assign the incoming package to the PACKAGE CARD. You will see a small notification in the assign slide in indicating you will be given the unpack option once you complete the assignment.

Once you complete the assignment, you will see this pop up:
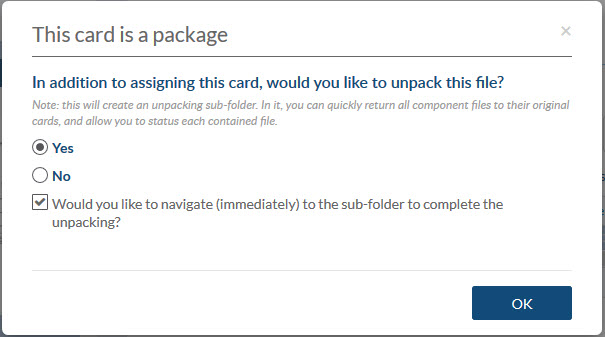
After accepting this pop-up, you will be redirected to a sub-submittal folder where you will review the prospective unpacking.
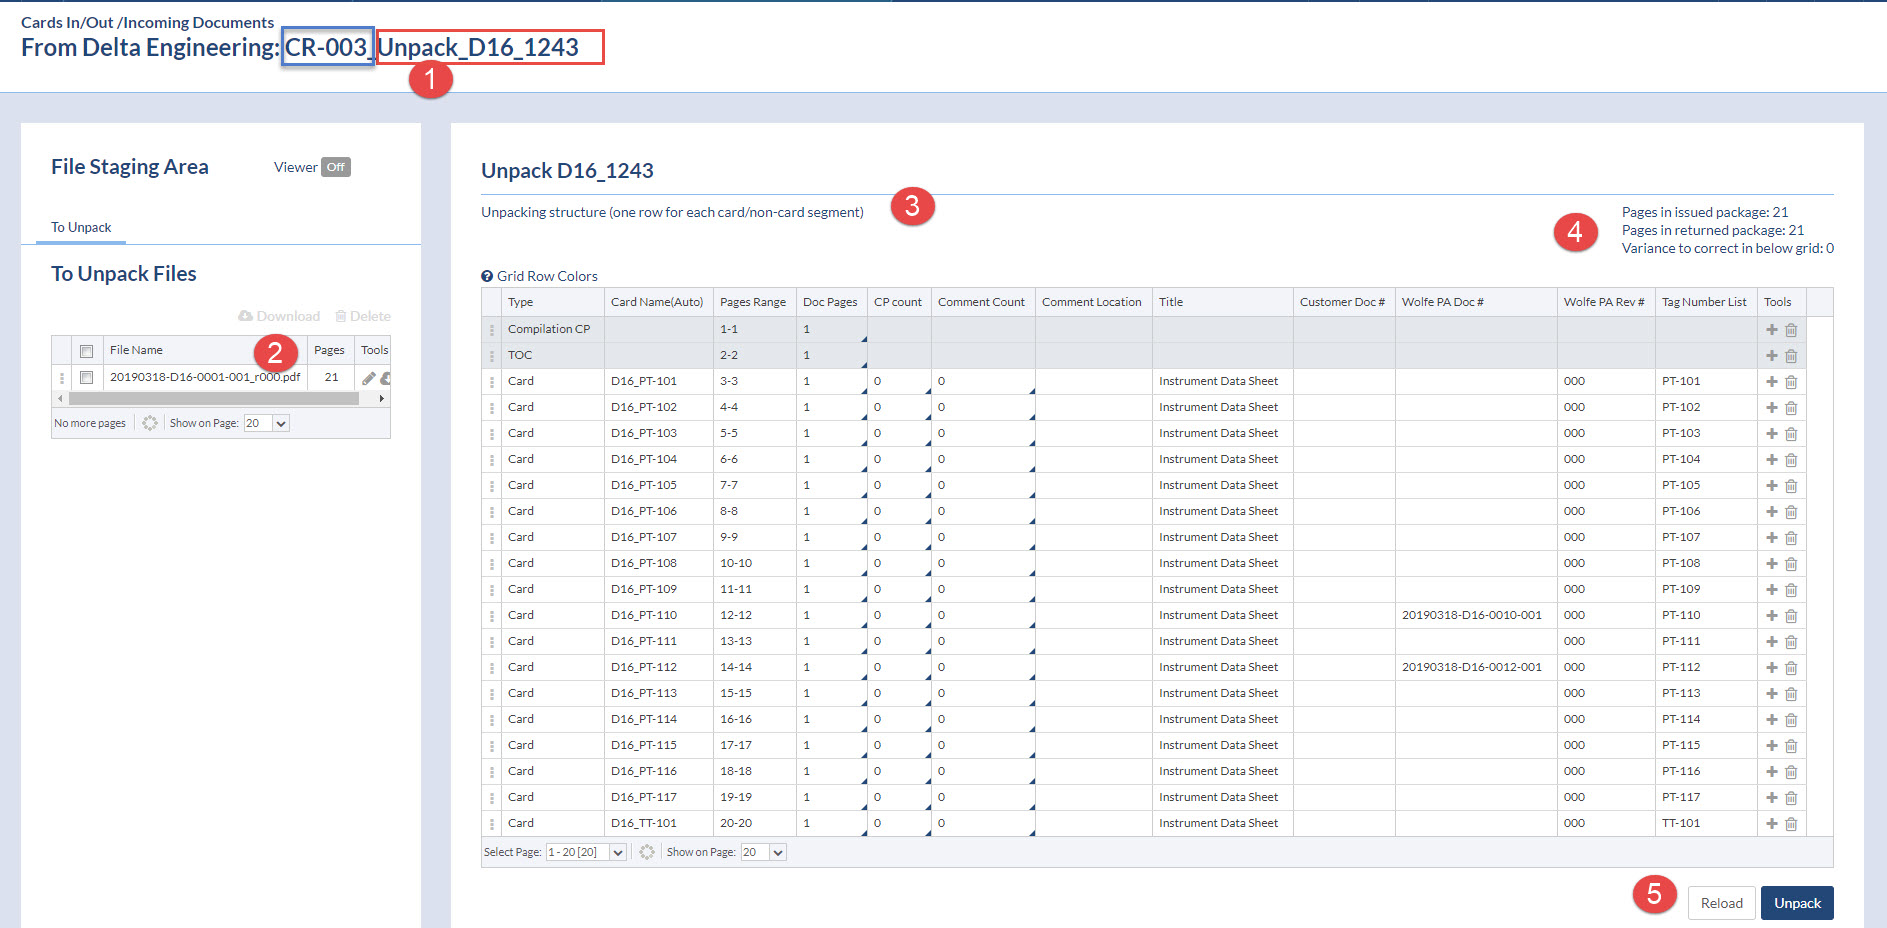
If your customer edited the package before returning, you can change how we allocate pages to cards.
Maybe the customer removed cover pages, added comment pages, removed doc pages etc.. That information can be edited on the grid, and the PAGES RANGE will auto-update.
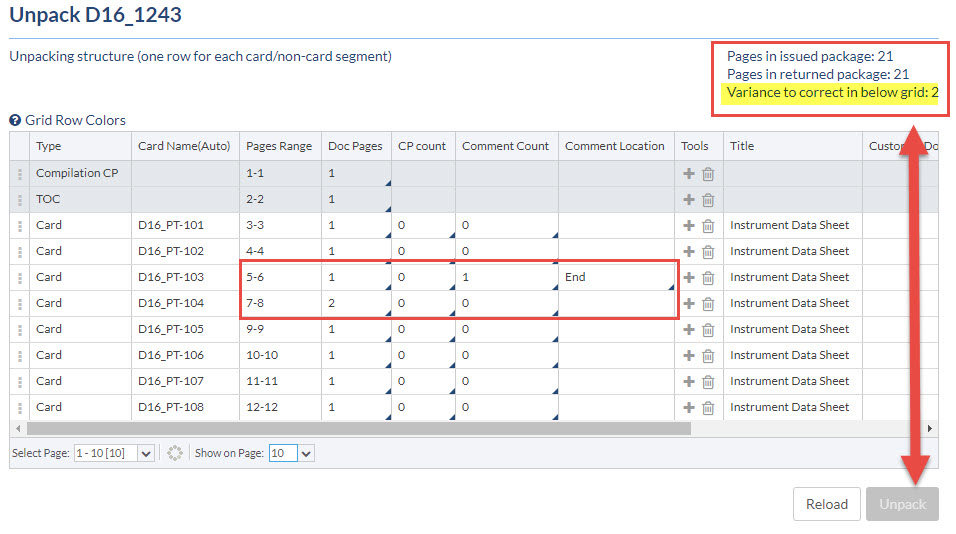
Note that you need to ensure the summary data is accurate to enable the unpacking button. In the below example, I added a comment page, and changes doc pages from 1-2. You can see that the system now is trying to understand WHY I made that change (we expected 21 pages, the returned doc HAS 21 pages, and now the grid says to expect 23 pages)
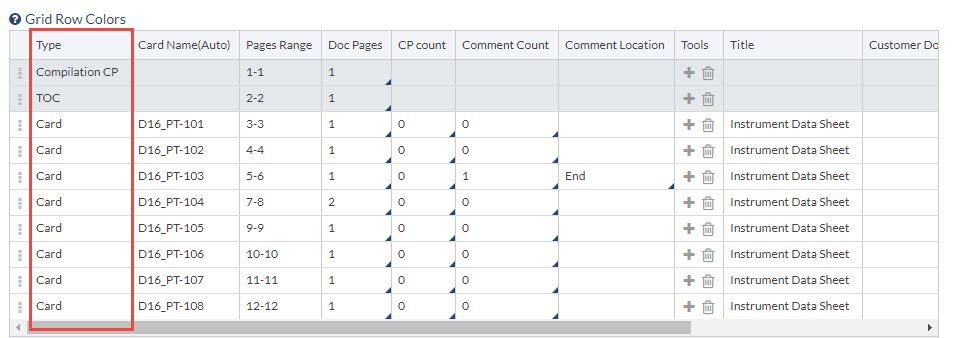
If your customer changed the order of the cards in the package prior to returning, you must edit the grid to match the returned file.

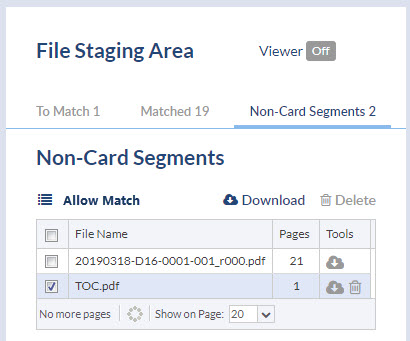
You can remove any card from the grid (maybe the customer did not return that card). You can also add non-card segments to the packages. If you have pages which are applicable to existing cards (maybe the customer has embedded old cards into the package) you should mark them as non-card segment. After the unpack, you can assign non-card segments to back into existing cards.
DocBoss identifies every page, and allocated it to a card, or sets it as a non-card segment. This is done automatically, based on the composition of the package when sending.
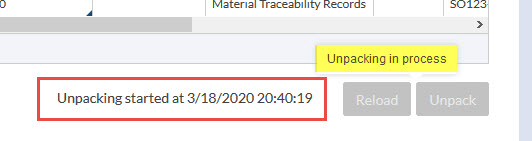
Could take a few minutes to split the incoming PDF. You’ll see the status at the bottom of the screen.
the user is moved into a normal BULK match process to verify cards.

If you wish to move a non-card segment back into the To Match area, you just select it, and click Allow Match.
The last step (as with bulk processing) is to assign statuses and routing to the individual files. You can do this through the same process as the bulk submittal processing (individually or process in bulk). You have the option to add meta data to the files, change revs etc (just as with a normal bulk upload).
After unpacking you will have
1. The ORIGINAL package card in some status/routing.
2. Each component card containing the applicable pages from the package. They will have their own status/routing. So – you could send one of the component files back to a supplier etc…. Once returned, regenerate the package, and send to customer etc…
Here’s another article we’ve written that might interest you: Adding Customer Contacts In DocBoss For A Project
Want to learn more? Contact us to set up a free online demo to discuss how we can help you get a better handle on document control.


DocBoss is the only true document control system for
suppliers. Book a quick demo to see how we help process
equipment suppliers make more profit with less pain.
Happy New Year! After a year dominated by COVID headlines, most people around the world wonder what 2021 has in…
Assume you have a drawing for each tag, but your customer requires that you submit only ONE PACKAGE containing all drawings (sorted…

Whew! Carrying on with the tiles available on the project dashboard, the project hub is a new landing page designed…