
Create An NDE Log And Generate Quality Packages (Welding)
If welding constitutes part of your EPC projects, you probably work regularly with welding certificates and welding procedures that need…
Library documents are typically published documents or documents that can be reused from project to project. DocBoss uses the library for uploading, storing and reviewing these documents.
Examples include:
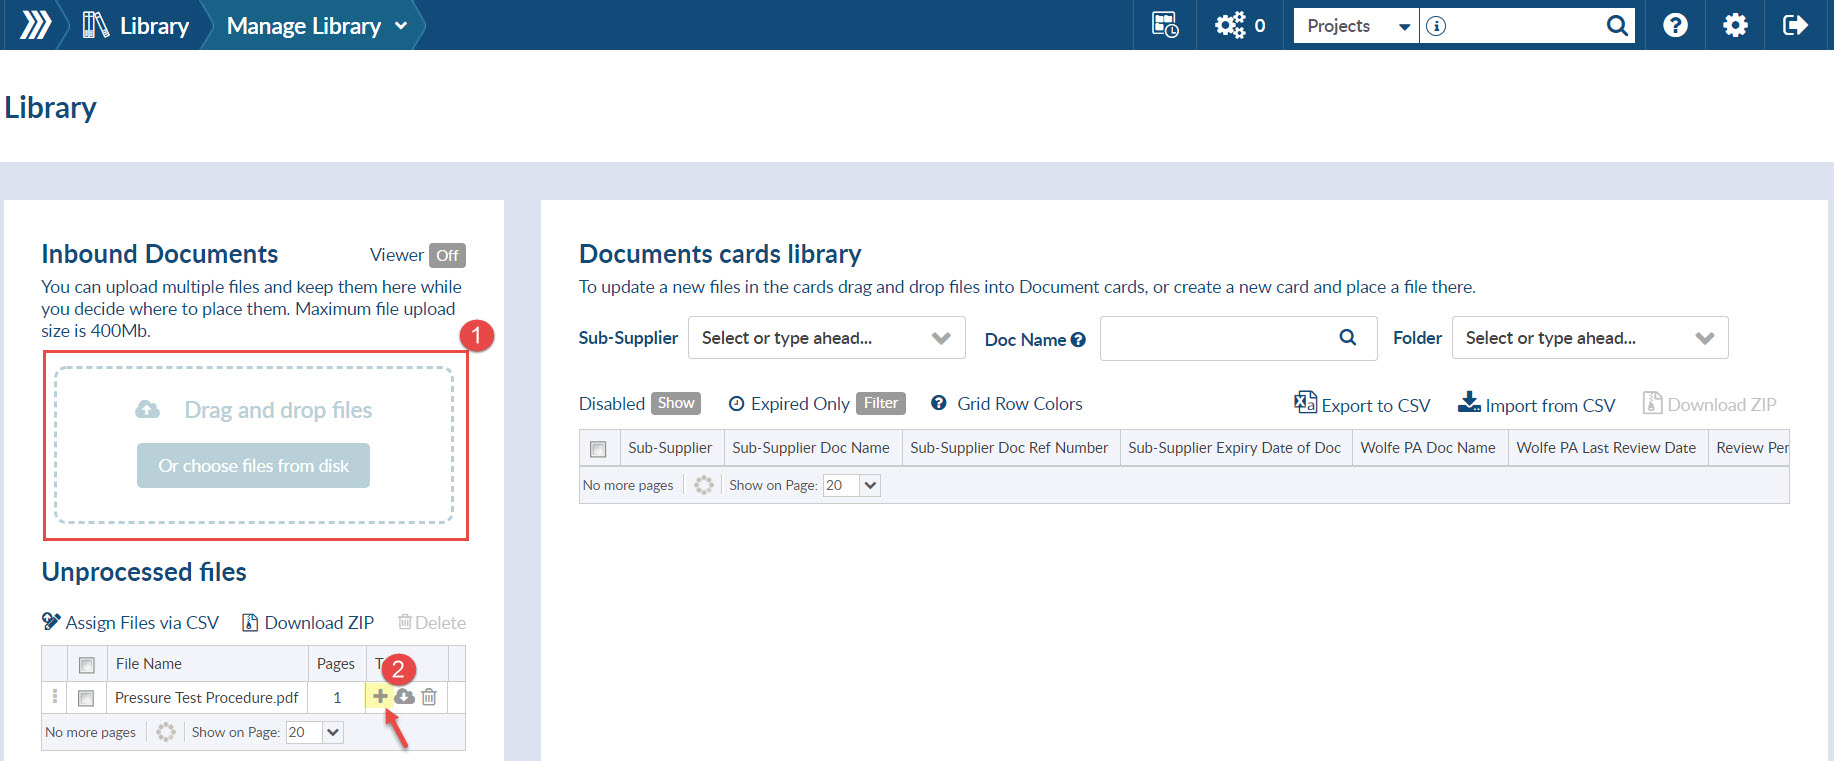
To attach a single document, after uploading the document to the Inbound Documents section of your library you click on the + button under the actions column. You then proceed to enter the meta data discussed above and click save.
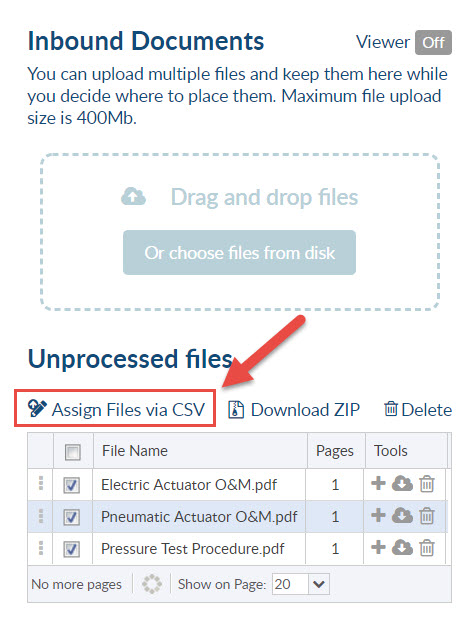
To add multiple documents to the library, once you have uploaded your documents to the Inbound Documents section, you can then select applicable documents and press the Assign Files via CSV.
Once you have your export you fill out columns with applicable information. Please note that you do not change the ID column or the File Name column (Do not Touch). Again any columns with an asterisk symbol are mandatory.

You will then save your file as CSV, and go back to your grid and press Import from CSV, browse for your file and save. This will attach all applicable meta data to each file and then add the documents to your library.
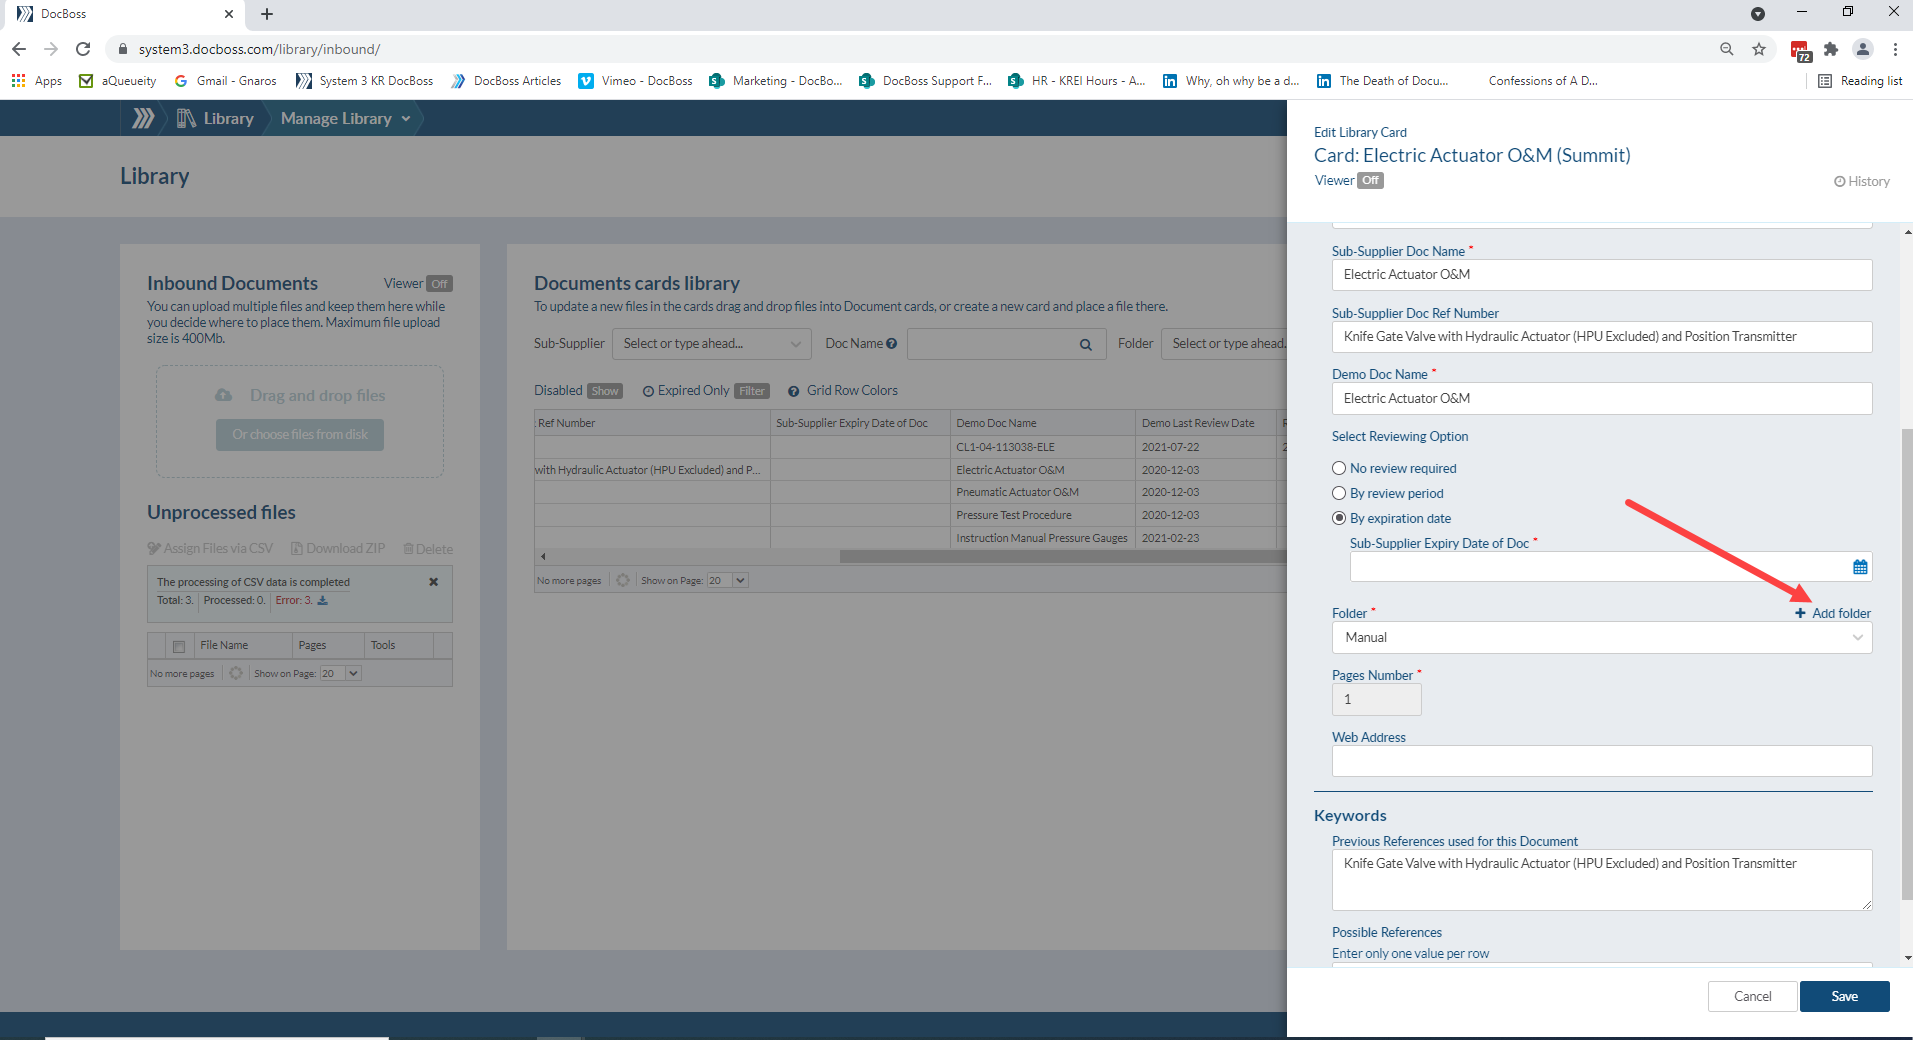
Below is a list of fields available when bringing documents into the library. All fields with an asterisk symbol * are mandatory fields.
*Sub-Supplier: The publisher of the document. Note that a Company must have “Sub-Supplier” checked in its profile to appear in this list.
*Sub-Supplier Doc Name: This is the title of the document as named by the publisher.
Sub-Supplier Doc Ref #: This is the reference number used by the publisher to control this document. Typically listed in the bottom right corner of the document.
[Instance] Doc Name: your company may have a different way to refer to this document (a common name). This is field is included in search, so be sure to add several search terms in this field.
Reviewing options: The reviewing options are designed to keep documents as current as possible. During the initial upload you assign the reviewing options and associated the documents to a specific customer. When the document has reached the review period or expiration date, an alert will appear in the library reminding you that cards need review. The grid row will also change color to indicate they have expired.
*Folder: This is the grouping you want the document to be assigned to. (This plays an important role when using the auto assign feature.)
*Page Number: The number of pages in the document, this should auto-populate
Web Address: If this is a internet published document, you can enter the website where it can be found.
Keywords: Keywords can be entered to improve searching ability. Note that additional keywords will be added automatically as the document is used in production.
To add a new folder, or edit an existing Library Folder, 1) navigate to the Admin/Settings Menu and click on 2) “Library Folders”. Here you can add/edit the folders. 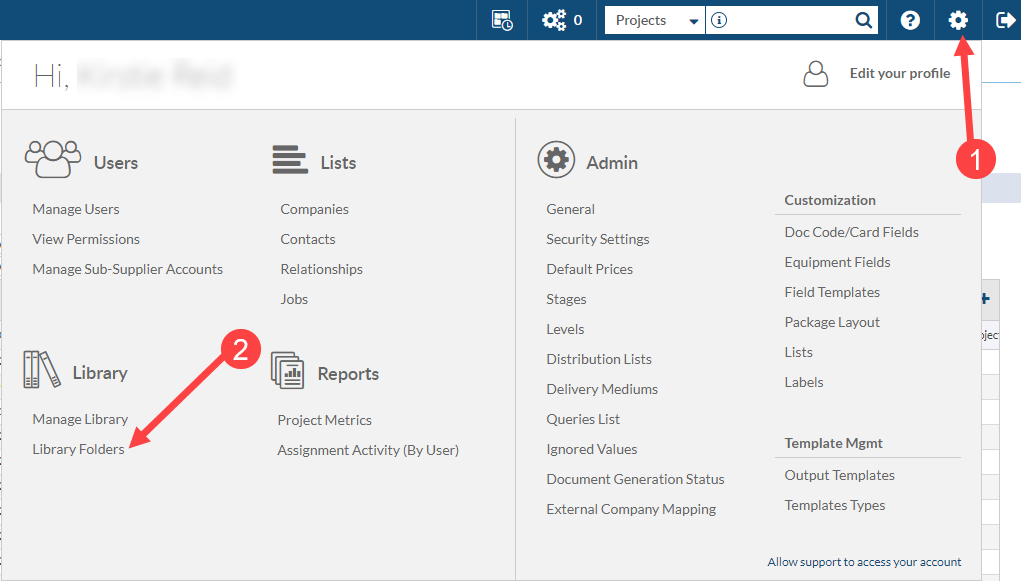
New folders can also be added in the assign screen when bringing in a new library document.
DocBoss is the only true document control system for
suppliers. Book a quick demo to see how we help process
equipment suppliers make more profit with less pain.