Blog
How To Use The DocBoss Internal Approval Cycle
Internal approval is often of interest to companies who assemble engineering documentation on behalf of their customers. They want to…

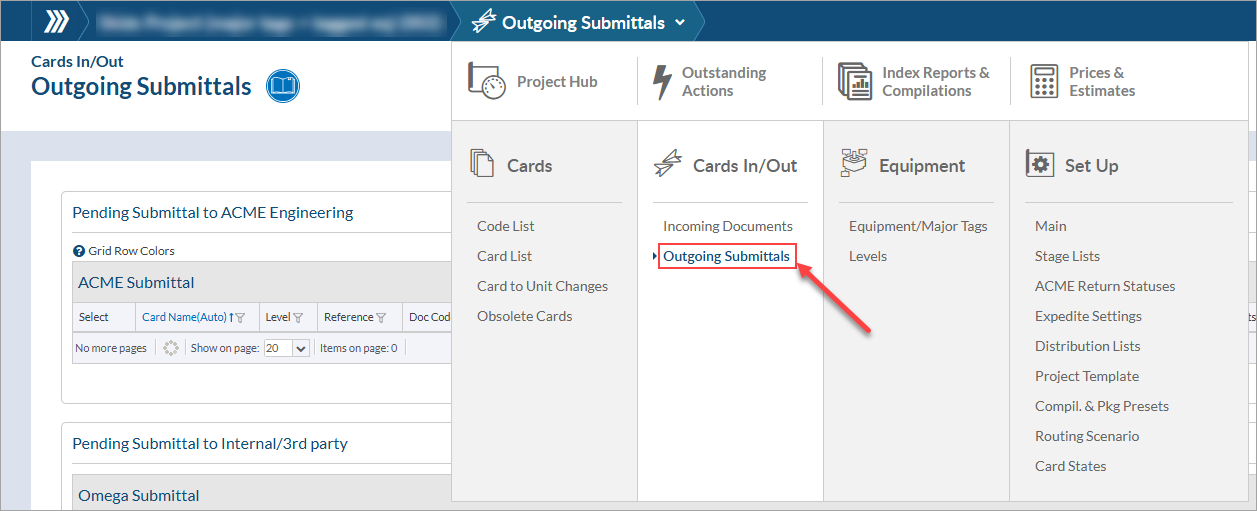
Documents that are available for submission (based on workflow) will automatically move to a queue located on the outgoing submittals screen. The grid in which they appear depends on the workflow target default, it is the customer
To see your outgoing submittals, navigate to Project Menu > Cards In/Out > Outgoing Submittals.
There are four types of Submittals you can generate in DocBoss:
When a document is ready for submission, it will move to one of your pending submittal queues. Once a document has been included in a submittal, it is removed from the “pending” grid.
Step 1 – Place a check mark in the “Select” column beside the document(s) you wish to submit.
Step 2 – Click “Start Submittal”. A pop-up will appear allowing you to enter applicable details regarding the submission.
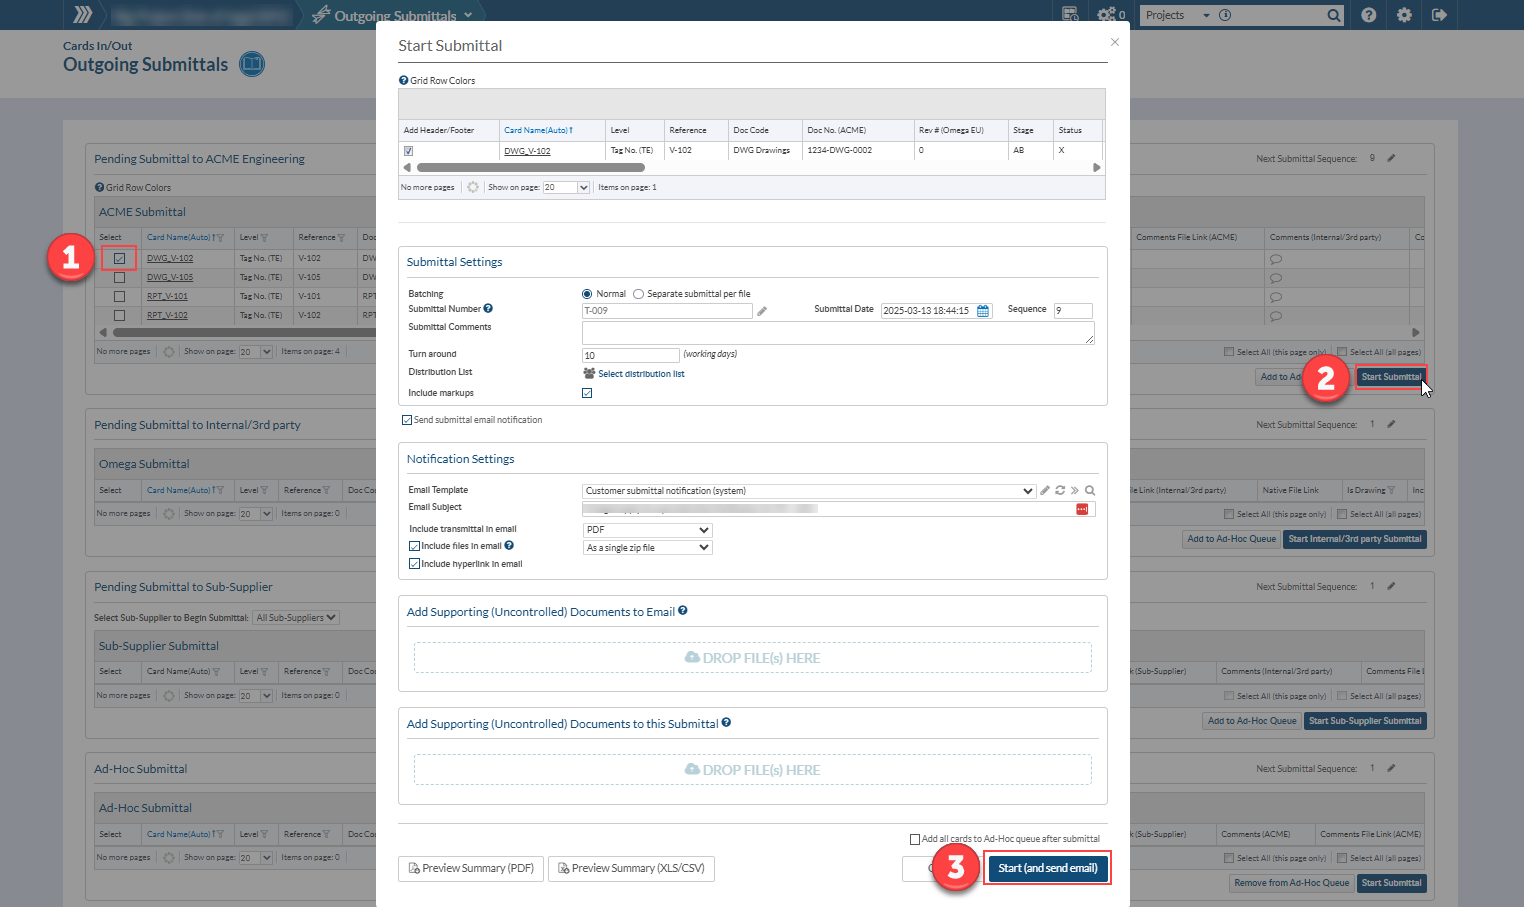
When creating your submittal, DocBoss auto-populates the following fields:
Step 3 – Once you have entered all applicable information, click “Start.”
When you make a submittal to the target (customer/sub-supplier), it will become available in the portal. Even if you choose to start the submittal with no email, the submittal will still appear in the portal.
Do you need sub-packages for each of your databook sections? We have written about that too.


DocBoss is the only true document control system for
suppliers. Book a quick demo to see how we help process
equipment suppliers make more profit with less pain.
Internal approval is often of interest to companies who assemble engineering documentation on behalf of their customers. They want to…

If you need to place a stamp on a particular document(s) before submission to your customer, DocBoss can help. DocBoss…

We’ve already spoken in the past about how DocBoss differentiates between markups and comments in your submittal packages that are…