
Product Updates
May 2026 Release Notification
Here is our May 2026 Release Notification with brand new functionality that is now available to all DocBoss subscribers. This…
Read Now
This article explains the steps to applying stamps. Please keep in mind, for the stamps to show on the documents (not just a preview), they must be sent via outgoing submittals. It is during this process DocBoss adds the stamp you apply to the document.
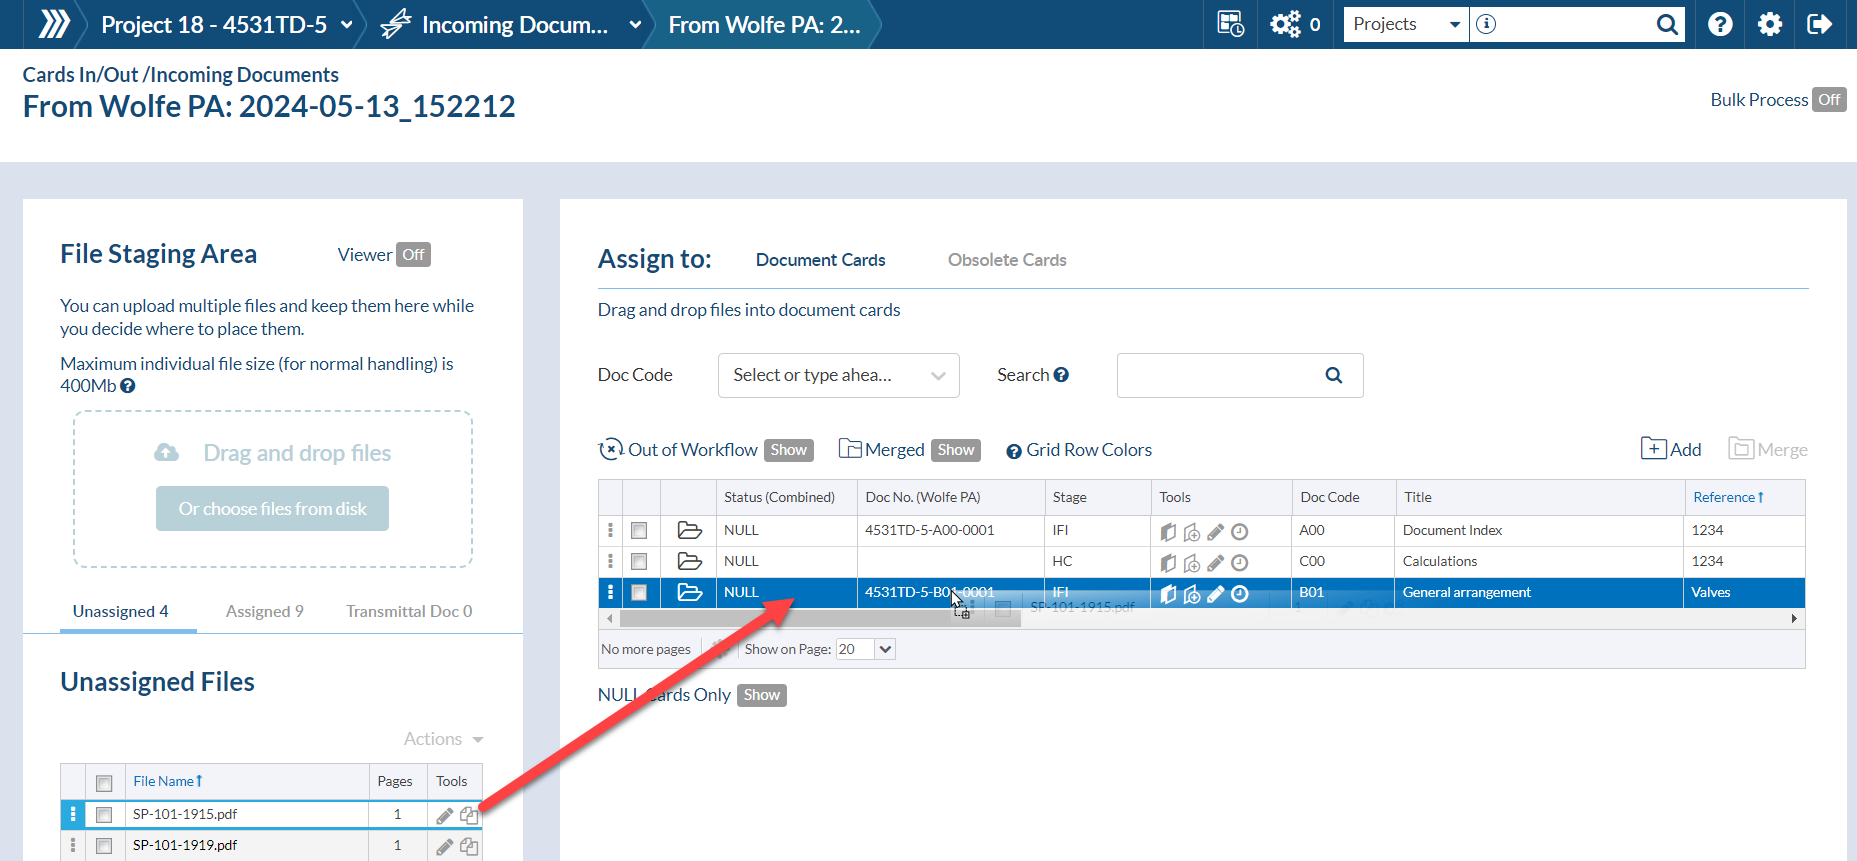
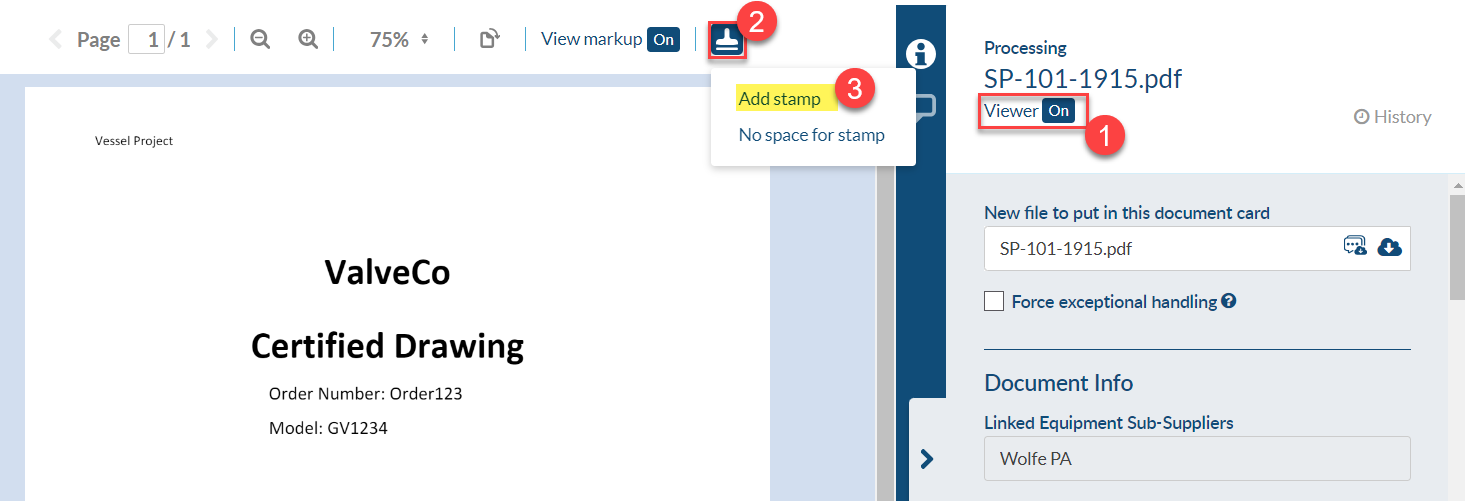
Stamps can be applied on the document Viewer once the file has been assigned to the Card. This process can be done from the assignment screen in Incoming Documents or from the Outstanding Actions screen.
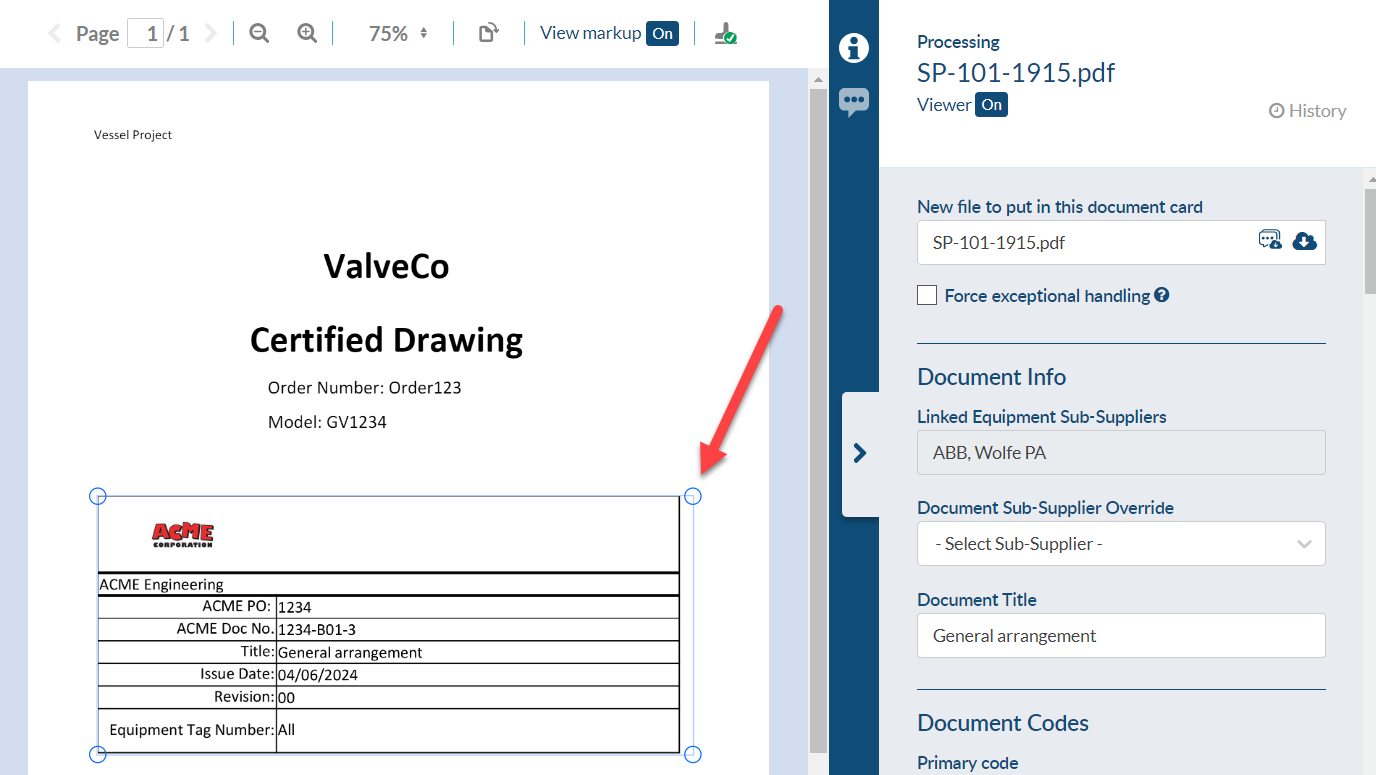
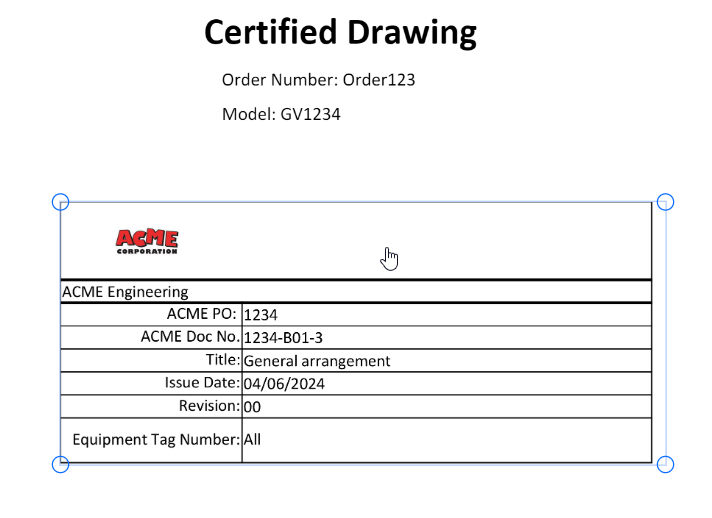
The stamp it is applied in its default size but it can be resided and placed in a different area on the document.
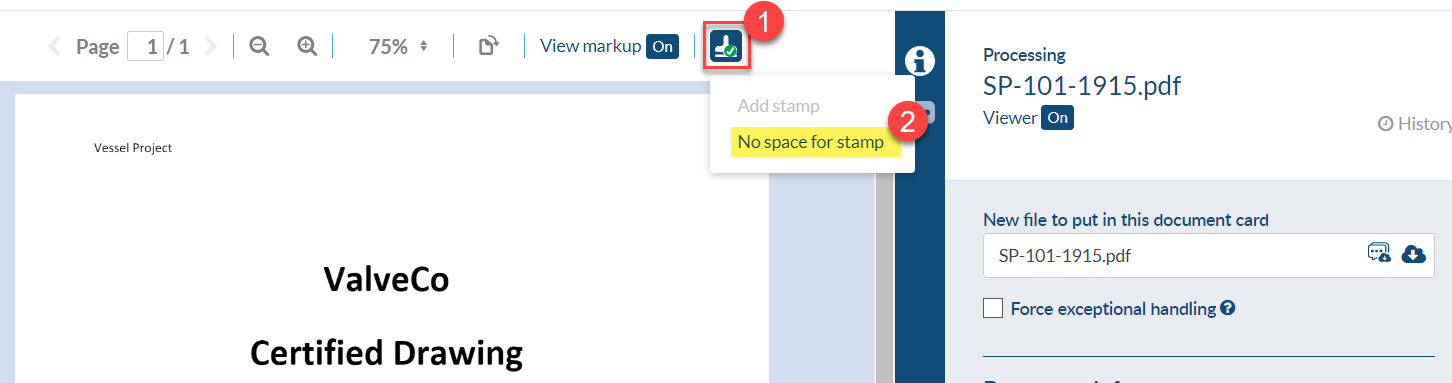
If the system is requesting a stamp, the user can select “No space for stamp” to satisfy the stamp request.
Also – if you wish to remove and re-apply the stamp, click once on the stamp with your mouse and then the delete button on your keyboard.
Once you have completed the stamp, click the checkbox to save
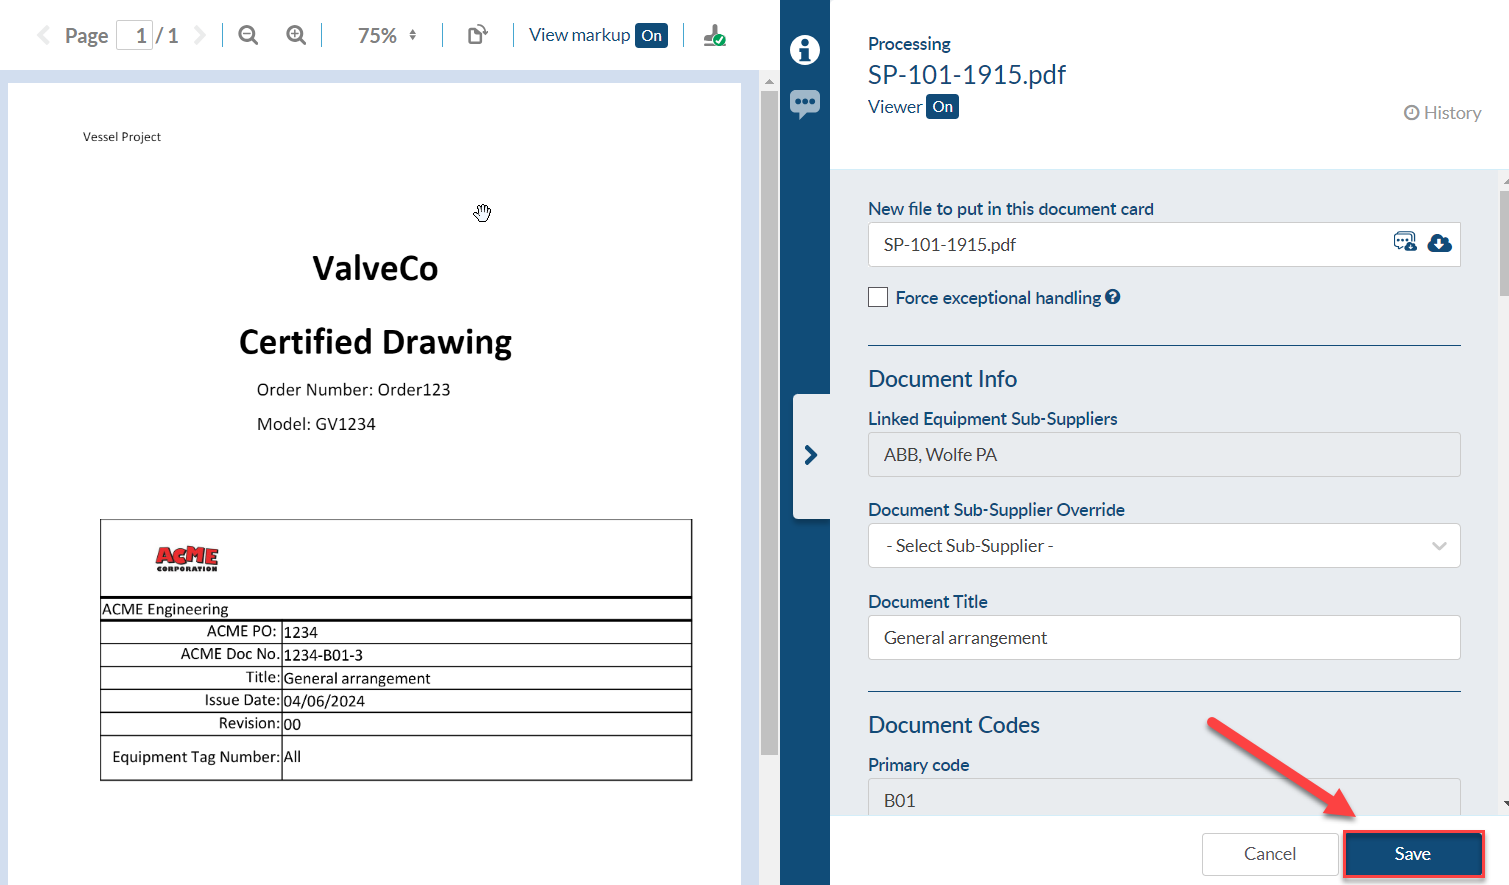
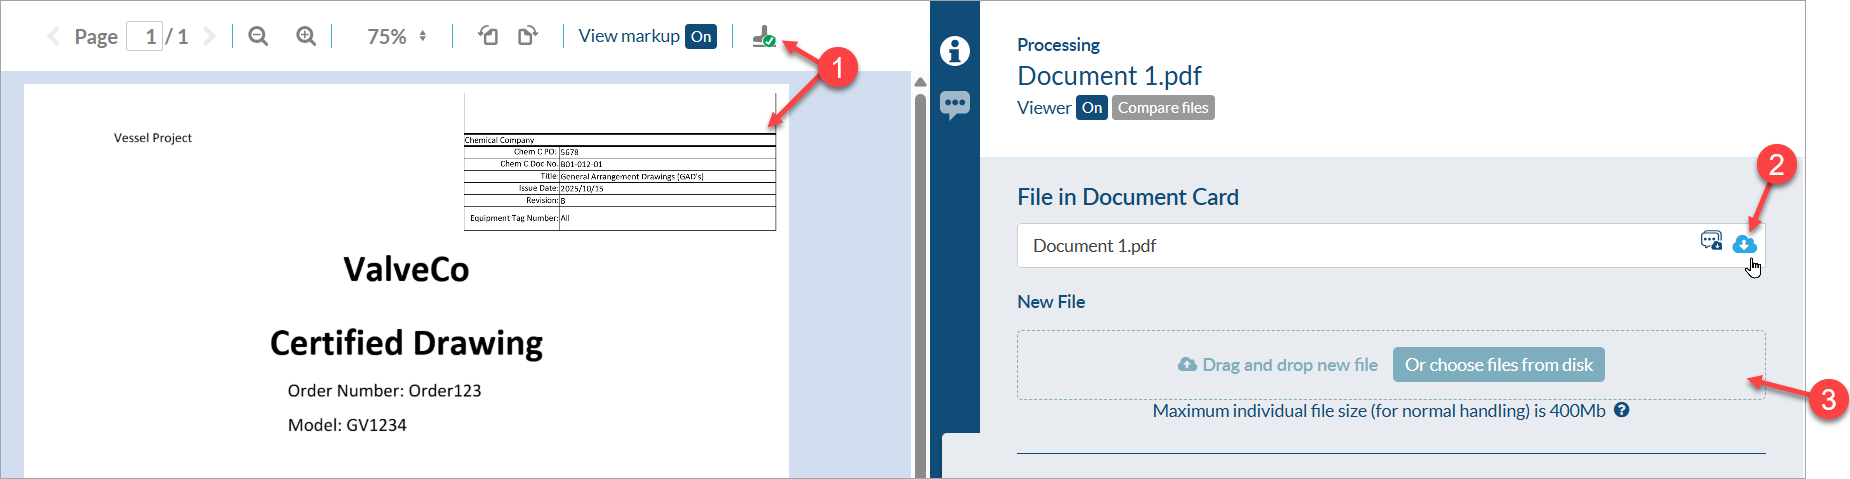
If stamps need to be included on documents that will not be submitted individually, (1) apply the stamp to the document, (2) download the file from the processing form (which will include the stamp), and (3) re-upload the file to the “New File” drop-zone on the processing form. Once uploaded, click save.
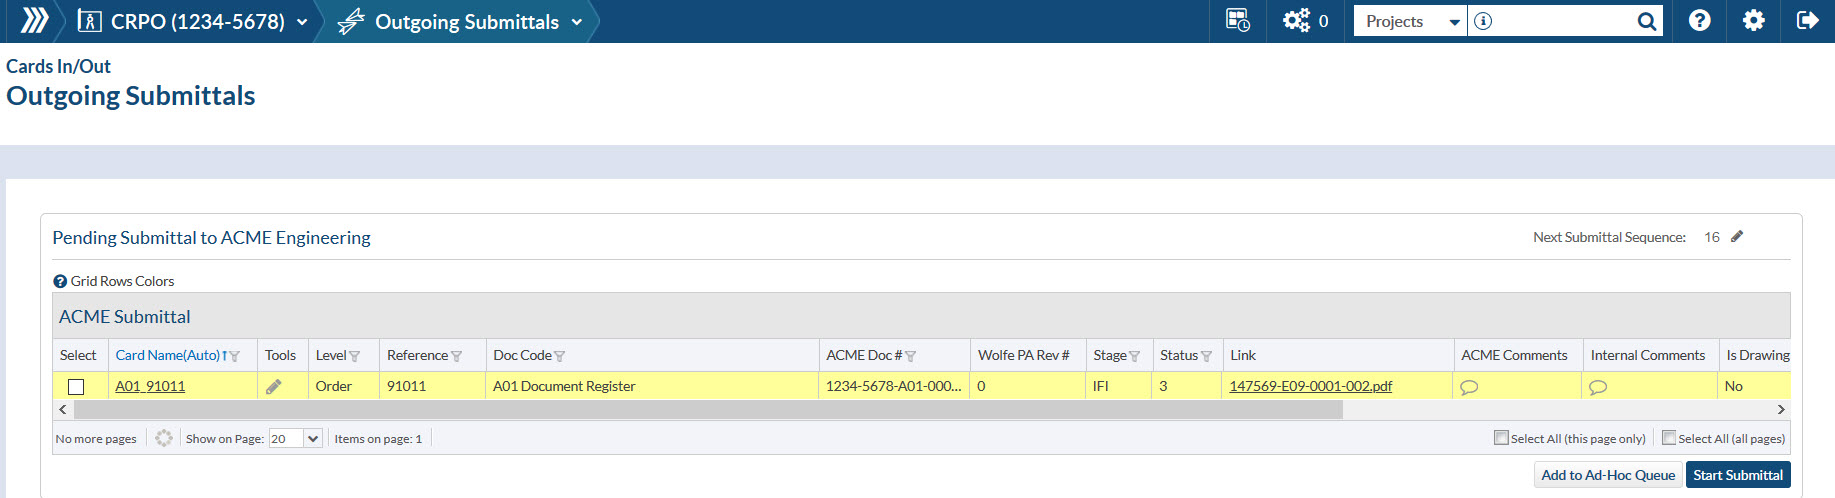
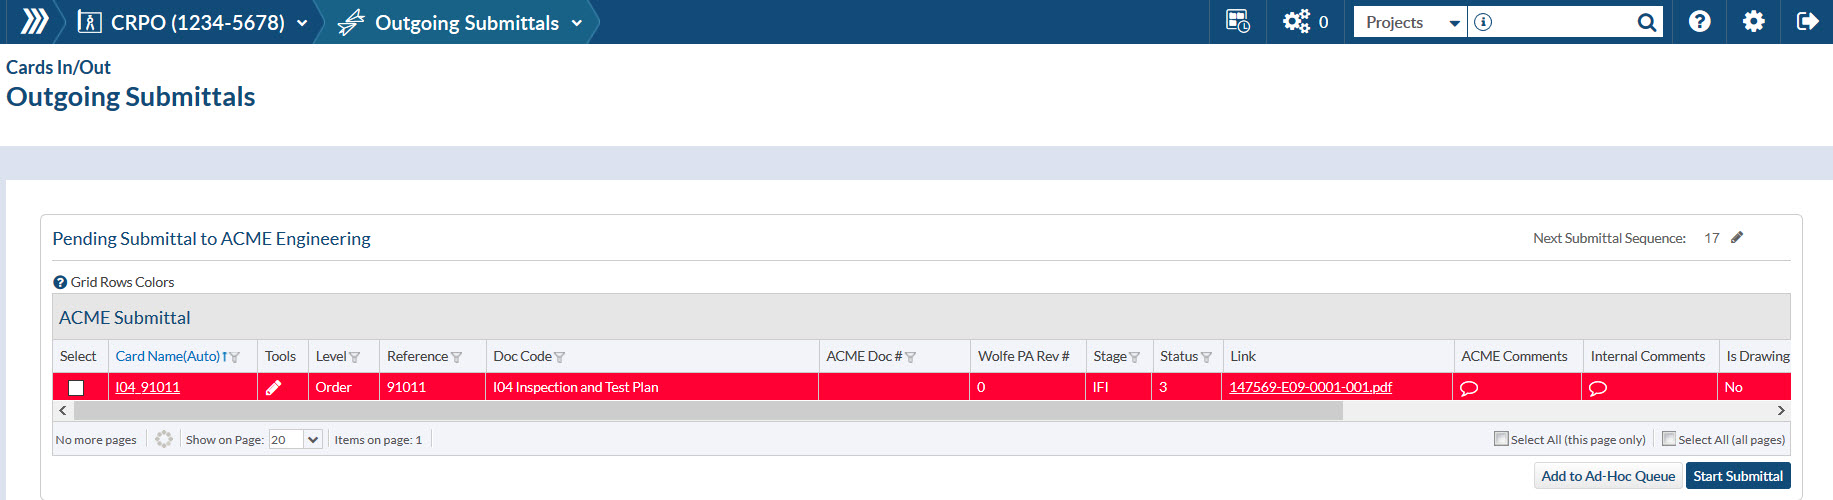
If option “Stamp, else cover page” or “Stamp and cover page” are selected on the Code, and Stamp is not applied during the submittal, DocBoss will warn you in the Outgoing Submittal grid that Stamp is missing.
In case of “Stamp, else cover page” the line in the Outgoing Submittal grid will be yellow:
And in case of “Stamp and cover page” the line in the Outgoing Submittal grid will be red:
DocBoss is the only true document control system for suppliers. Book a quick demo to see how we help process equipment suppliers make more profit with less pain.
Here is our May 2026 Release Notification with brand new functionality that is now available to all DocBoss subscribers. This…
Read NowHere’s a list of updates found in our February 2026 release. Interface Changes Incoming Documents – Assign pop-up: The layout of the incoming assign…
Read NowIf your EPC projects require you to update equipment as the project progresses, how difficult is it for your current…
Read Now