 For Instance eSignature (no visible stamp)
This article explains the first step in the eSignature process.
It must be generated by an admin user via the admin menu:
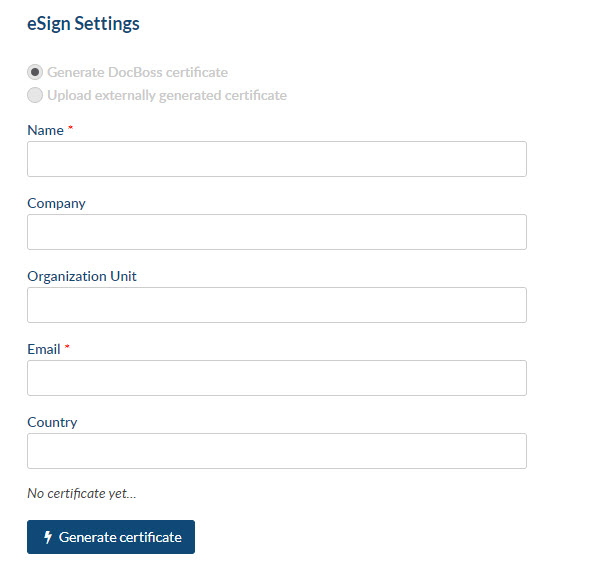
Navigate to Admin > General > Instance eSignature Settings:

Select whether you want DocBoss to generate a certificate for you, or if you will upload an externally generated certificate (by a certificate authority).
Note that DocBoss is not a registered certificate authority, so if you are signing to satisfy a legal requirement, you should purchase/register your certificate with a registration body.
For most purposes (track if changes have been made to a file after submittal), the DocBoss certificate is sufficient.
Click Generate Certificate. The certificate is re-created, and the expiry date is set to 25 years from the generation day.
The stamp will be created using the instance name, and a generic eSignature icon.
User eSignatures (user applied stamp)
Navigate to User Profile > eSignature Settings
The Name and Email fields will be filled from the user profile information.
Company will default.
If you leave other fields empty, they will not be part of the certificate.

For information on how to Set eSignature requirements per Doc Code (or card) (Step 2), see our article here.
For information on Applying eSignatures to Outgoing Submittals (Step 3), see our article here.
For information on Signing files with eSignature (User action) (Step 4), see our article here.
